You’ve framed your image. You’ve pressed the shutter button and taken the shot. You quickly review the image on the camera and find out that your subject is horribly out of focus. What do you do? You have a few different tools at your disposal for showing the camera that you’re the boss of it, and different ones are useful in different situations.
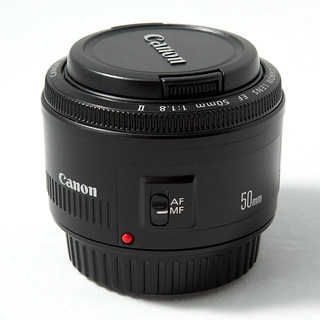 The first thing you can do is switch to manual focus mode. That’s probably really obvious, but if you’re in the habit of relying on autofocus for everything it might not occur to you that you can do it yourself. Flip the lens or camera into manual-focus mode (depending upon your camera), then grab the focus ring and twist it until you get exactly what you want. If you’re using a zoom lens you might find yourself habitually grabbing for the zoom ring rather than the focus ring, but practice a few times and you’ll eventually start getting the right one automatically.
The advantage of manual focus is that you’re in complete control of the focus. The downside is that it’s sometimes hard to tell when your image is precisely in focus. This is especially true with cropped-sensor cameras that have smaller viewfinders. Many cameras will light up a focus point when that part of the image is in focus even when you’re using manual focus, so you might be able to use that as a guide.
If your image is static, you can use the camera’s LCD as an assistant. Focus, take a shot, then view the image on your camera’s LCD screen. Zoom in on it and scroll around to see if the right parts of it are in focus. If not, correct the focus and try again. (In a competition between film and digital, film would lose hard on this point.)
Many lenses have distance scales on the barrel. If you know that your subject is six feet away from the camera then just turn the focusing ring on the lens until it’s focused at a distance of six feet. Voila!
The second thing that you can do is to use autofocus, but give your camera some extra guidance about what to focus on. Almost all cameras will let you choose one specific autofocus point rather than letting the camera pick its own. If you’re shooting a portrait, for example, you could choose an autofocus point that’s right over one of the model’s eyes. If you do that and the camera can find focus, then you’ll probably get the shot that you’re looking for.
Consult your camera’s manual for specifics of how to choose a focus point, since this can vary quite a bit between makes and models.
There’s a third strategy that will work well in some situations, but it’s a little bit tricky and doesn’t always get what you’re looking for. It’s called focus and recompose.
Imagine that you’re shooting an image with your subject in the bottom right corner of the frame, and your camera won’t focus on it naturally. With focus and recompose you point your camera directly at your subject, then press the shutter button halfway down so that the camera focuses on your subject. Keep holding the shutter button down while you move the camera back to the composition that you want, then take the picture.
Sometimes this works. It will probably do OK if you’re using a narrow aperture and therefore have a lot of depth of field. If you’re shooting a portrait, or shooting with the lens wide open, you probably won’t get what you’re looking for. Explaining why this is would require you to remember some of your high school geometry and do some math, so I won’t explain the details here. The short answer is that when you move the camera you’re changing the distance to your subject ever so slightly, and that might be enough to make your subject go out of focus.
And there you go– you now have three tricks that you can use for showing your camera who’s boss when you’re trying to focus. I recommend that you go practice each of them, so that you’ll have them ready to go the next time your camera gets some crazy ideas about what to focus on.

