Welcome to Stop Shooting Auto!

Stop Shooting Auto! is a set of photography lessons and associated articles, mostly dealing with getting the correct exposure. The lessons are very friendly to beginners who know very little about photography. If you’re scared to take your camera out of green box mode because you have no idea what the controls do, or you don’t even know what green box mode is, this is the site for you.

If you’re new here, you’ll want to start by going through the Exposure Lessons in Order. These lessons are designed to take you from knowing almost nothing to understanding the fundamentals of exposure. Don’t forget to do the exercises so that you practice what you’ve learned. Practicing and experimenting are the best ways to really understand what you’re doing.

Other interesting articles that don’t specifically deal with exposure lessons can be found in the Index of Entries.

Please feel free to ask questions and leave comments– I like getting reader feedback! If you’ve learned something from the site, let me know. And please spread the word, since more readers make me a happy Patti.

7 Comments

Filed under Introduction

How to Remove Spots From Your Pictures

Stop Shooting Auto! is intended as a set of lessons for helping you to understand the basics of exposure, and to help you learn to use your dSLR more effectively. I’ve deliberately avoided any discussions of post-processing, because I believe that a good image is the result of solid technical fundamentals, and that post-processing should focus on minor corrections more than repairing bad shots.

Orange TulipOn the other hand, sensor dust is the bane of the dSLR photographer’s existence. No matter how thoroughly you clean your sensor, you’ll wind up with at least a few dust spots on your image if you shoot at smaller apertures. I’ve cleaned lots of sensors in my time, and while it’s easy to reduce the amount of dust on your sensor I think it’s impossible to completely eliminate it. In case you’ve missed these entries, you might want to review Why are there spots on my picture? and How To Clean Your Sensor for information on what sensor dust looks like and simple instructions for cleaning most of the dust off of your sensor.

Maybe it’s because you forgot to clean your sensor, or maybe you didn’t get all of the dust off, but eventually you’ll wind up with an image that has visible and annoying dust spots. They’ll be most visible when you have smooth gradients, like the orange tulip image that accompanies this entry. As it turns out, dust spots are fairly easy to remove. Every major image editing program should have a spot removal or spot healing tool available to you. Here are some valuable links for how to use them. Also, you want to read all the way to the end of this article, because it contains a tip that may save you from feeling like a complete idiot someday.

Adobe Lightroom spot removal brush
Photoshop Elements Spot Healing Brush
Photoshop Spot Healing Brush
GIMP’s healing tool

For all of these tools, the process is approximately the same.

  1. Select the tool.
  2. Select a brush size that’s slightly bigger than the dust spots that you want to remove– you may have to do this with trial and error, but it’s pretty easy.
  3. Scroll through your image looking for dust spots. When you find one, click it and the software should remove the dust spot and heal it using information from nearby areas of your photo. For slightly larger spots, you can paint over them with the spot healing brush.

There are other ways that you can do this, and occasionally one will work better. You can use a clone stamp, but that can be a pain in the butt. In Photoshop, I’ve recently started using content-aware fill for spots where the healing brush doesn’t quite give me the effect that I want. It’s a little bit more work than the healing brush, but sometimes the results are better. I’ve included a before-and-after photo from the orange tulip photo so that you can see how nicely spots can be removed. This one was probably a tiny little piece of lint on the sensor, judging by the shape of it.

Incidentally, these techniques work well for things other than dust spots– if you shot a portrait and the model has a zit right in the middle of his or her forehead, spot healing is a miracle drug that would put the pharmaceutical industry to shame.

There’s one thing that none of these tutorials tell you, though, and it’s an important thing. In fact, the words I’m about to write may save you a whole lot of frustration and annoyance if you remember them. Are you ready? Here we go.

Before you start removing dust from your photos, clean the dust off of your monitor! It’s such a simple thing, and yet I always find myself clicking on a dust spot over and over like a crazed monkey, wondering why it won’t go away.

DustRemoved


Leave a comment

Filed under Discussion, Stuff

I just got a digital SLR. What do I do now?

If you’ve been a very good boy or girl, Santa Claus might have left a digital SLR under the tree for you. Maybe you know nothing at all about photography, or maybe you’ve been shooting with your phone or with a point & shoot camera for a while, and now you have this fantastic new camera. What’s your next step?

A lot of photographers will give you a lot of different advice. Some will tell you that the first thing you should do is read the camera’s manual from cover to cover. Others will tell you that you absolutely have to replace the kit lens with something better. If you have exceptionally smart friends, the first thing they’ll do is send you to this website and tell you to learn about exposure. :-)

From where I sit, they’re all wrong– even the ones who sent you here. Let me explain why.

Reading the manual is great if you already have a good understanding of photography and you just want to know the specifics of the individual camera controls. Even then, it’s going to be way too much information for you to absorb all at once– it will be trying to drink out of the proverbial fire hose. Plus, the manual will tell you what all the buttons and menus and doodads and doohickeys do, but it won’t give you much of an understanding of why you’d want to do any of those things. So do read the manual, but only as much as you need so that you can turn the camera on and take some pictures. Once you get that far, stop reading and put the manual away in a safe place.

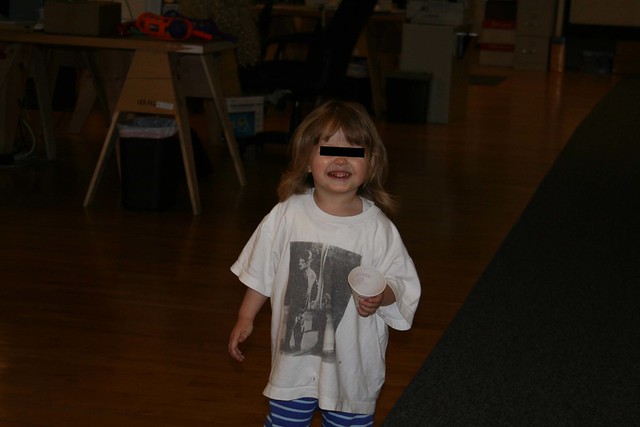
People are right that the kit lens that came with your camera probably isn’t very good. Who cares? If you’re a beginning dSLR owner, you won’t be very good either. I wasn’t. You want to see how bad I was? This is the very first image that I took with my first digital SLR.

IMG_0001_obfuscated

I think she’s the daughter of a coworker, but I’m not sure– hence the black bar on her eyes. It’s a great picture, isn’t it? Yeah, OK, not so much. The second one isn’t much better– it’s a photo of the lens cap. I kept at it, though, and a few months later when I visited Alcatraz and shot this gem:

IMG_0595

OK, at least it’s properly exposed. The focus leaves something to be desired, though. I think I was trying to capture the geometry of the tank, but I failed miserably.

The general philosophy over here at Stop Shooting Auto! world headquarters is that you should only buy new camera gear when you have a specific need that isn’t being met by your current equipment. If your lens really isn’t good enough, then by all means go invest in a better one. When you’re shooting at this level of competence, though, it’s not your equipment that’s holding you back.

As for reading this website, well… I happen to think it’s a damned fine site full of useful content, and it’s one that every beginner should get to eventually. If you just got the camera, though, you should wait a little bit before you dive in here.

So now that I’ve told you what not to do, I guess I should say something positive. The thing you should do more than anything right now is go take some pictures! The very best way to learn is to go out and practice, and experiment. You’ll get lots of really horrible photos, but that’s OK. Nobody has to see them unless you publish them on the web so the whole world can see how horrible you were when you first started out. (Ahem.)

Spend a few minutes looking at your pictures afterward. Are they good? Bad? What makes the good ones better than the bad ones? Can you identify the problems with the bad ones? You don’t have to know any technical language to do this– your eyes will understand. “This picture is too dark.” “This one is blurry.” “There’s a tree growing out of my friend’s head.” You probably won’t know how to solve these issues yet, but you’ll start to recognize common photographic problems. OK, the tree problem is easy to solve– don’t pose your friend where there’s a tree right behind his head.

After you’ve played around for a bit you’ll start to get a feel for what works and what doesn’t. That’s a good time for you to start reading. Dig into the exposure lessons here, and consult your manual when you need to know the specifics of how to do something on your particular camera. Take the time to do the exercises, since doing something is the best way to learn about it. Keep shooting, and keep experimenting, and eventually you can become a pretty decent photographer.

But for now, stop reading. Stop lusting after equipment. Just go take a bunch of pictures and see what happens.

Leave a comment

Filed under Discussion, Introduction

Holiday Gifts For The Digital SLR Owner, 2012 Edition

It’s that time of year when we all shop until our credit cards drop, then shop some more just for good measure. To get into the holiday spirit, I’ve put together a few fun gift recommendations for your favorite dSLR owner.

Happy shopping, and happy holidays!

LensBaby Spark Available for both Canon and Nikon mounts, this is a great little lens for playing around. You can tilt it or squeeze it to change the focus and get all sorts of cool focusing effects.
Crumpler 5 Million Dollar Home camera bag. I love love love my Crumpler bag! It’s the perfect thing for toting around a camera and a couple of accessories. It’s water-resistant, very well padded, and exceptionally well made. The pockets are in the right places and made for the things I want to carry. For more room (and more moolah), try the 7 Million Dollar Home instead.

If you want to go completely crazy, there’s the Brazillion Dollar Home. I want one just for the name!

Giottos Rocket Air Blaster. This is a perennial SSA! favorite. It’s useful for blowing the dust off of your gear, and for cleaning your sensor. You can also use it to blow the hair out of your face, annoy your cat, or any number of things.
DGK Color Tools Gray, Black, and White Cards.It’s always useful to have an 18% gray card in your bag, for setting white balance in difficult or unknown lighting situations. This one also comes with black and white cards as well for handling dynamic range. The set is waterproof and comes with a lanyard. At 4×5 inches, it’ll slip right into your Crumpler bag.

Gary Fong Puffer Pop-Up Flash Diffuser. Pop-up flash stinks, but most digital SLRs have one. This diffuser works surprisingly well for turning that harsh on-camera light into something softer and less obnoxious. I bought one this year when I was lending a camera to a friend, and I was surprised by how well it worked.

Leave a comment

Filed under Discussion, Stuff

Autofocus and Portraits

I want to talk specifically about autofocus when shooting portraits. To start off, let’s go back to the teddy bear portrait studio that I set up recently and look at a couple of example shots.

NoseFocus_f2

EyeFocus_f2

If you’re like most people, you’ll perceive the second image as being better than the first… the first one will probably seem like it’s not quite right, even if you can’t put your finger on why. Since this is an essay about focus, though, you probably spotted the difference pretty quickly– in the first image, the bear’s eyes are slightly out of focus, while in the second one they’re sharp.

As I mentioned earlier, shooting portraits can be tricky when you’re using your camera’s autofocus. Portraits are often shot with a fairly shallow depth of field, since you want your viewer’s attention to be on your subject and not on the godawful tiger-striped background that you’ve posed them against. (Again, don’t do that.) It’s extremely important that the subject’s eyes be in focus for portraits, because… well, because I said so and because every other photographer does too.

Here are a couple of closeups that illustrate the difference in my bear images.

NoseFocus_eye EyeFocus_eye

In the image on the left, the nose is in clear focus, but the eye is blurry. On the right, the eye is in sharp focus but the nose is a little bit soft. Why the difference?

In the first image, I just let the camera pick its own focus point. It naturally gravitated toward the center of the image, found a nose that it could grab onto, and used that as the focus point. That’s great if you happen to have a weird fetish for noses, but it’s not great for portraits. In the second image, I told the camera that I wanted to use a specific autofocus point only, and then plunked that focus point right on the bear’s eye. Voila! I got exactly the shot I wanted.

If you can put a focus point right on one of your subject’s eyes, then do that. Some cameras have only one or a few autofocus points. Others, mostly high-end cameras, have eleventy billion of them scattered across the image. (IF you want to see this carried to an extreme, check out the 61 autofocus points on the Canon 5D Mark III. Also, if you’d like to give me one I will be happy to put each and every one of those autofocus points to good use.) As always, check your camera’s manual to figure out how to choose individual focus points, as the controls can vary quite a bit between manufacturers and even between different cameras from the same manufacturer.

If you can’t find an autofocus point that works, then you’ll just have to resort to manual focus. By now you probably know that it’s not so scary. Just flip the camera into manual focus mode, then turn the dial until you get what you want.

Thus endeth my wisdom about focusing for shooting portraits. I have one other topic to cover before I put autofocus to bed, but I’ll save that for another day.

Leave a comment

Filed under Autofocus, Lesson

What to do when autofocus deserts you

You’ve framed your image. You’ve pressed the shutter button and taken the shot. You quickly review the image on the camera and find out that your subject is horribly out of focus. What do you do? You have a few different tools at your disposal for showing the camera that you’re the boss of it, and different ones are useful in different situations.

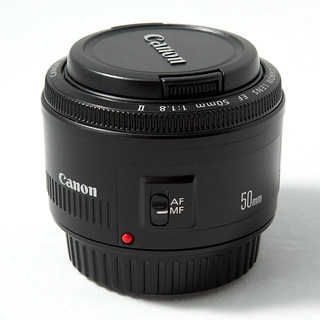
50mm f/1.8 Manual Focus The first thing you can do is switch to manual focus mode. That’s probably really obvious, but if you’re in the habit of relying on autofocus for everything it might not occur to you that you can do it yourself. Flip the lens or camera into manual-focus mode (depending upon your camera), then grab the focus ring and twist it until you get exactly what you want. If you’re using a zoom lens you might find yourself habitually grabbing for the zoom ring rather than the focus ring, but practice a few times and you’ll eventually start getting the right one automatically.

The advantage of manual focus is that you’re in complete control of the focus. The downside is that it’s sometimes hard to tell when your image is precisely in focus. This is especially true with cropped-sensor cameras that have smaller viewfinders. Many cameras will light up a focus point when that part of the image is in focus even when you’re using manual focus, so you might be able to use that as a guide.

If your image is static, you can use the camera’s LCD as an assistant. Focus, take a shot, then view the image on your camera’s LCD screen. Zoom in on it and scroll around to see if the right parts of it are in focus. If not, correct the focus and try again. (In a competition between film and digital, film would lose hard on this point.)

Many lenses have distance scales on the barrel. If you know that your subject is six feet away from the camera then just turn the focusing ring on the lens until it’s focused at a distance of six feet. Voila!

The second thing that you can do is to use autofocus, but give your camera some extra guidance about what to focus on. Almost all cameras will let you choose one specific autofocus point rather than letting the camera pick its own. If you’re shooting a portrait, for example, you could choose an autofocus point that’s right over one of the model’s eyes. If you do that and the camera can find focus, then you’ll probably get the shot that you’re looking for.

Consult your camera’s manual for specifics of how to choose a focus point, since this can vary quite a bit between makes and models.

There’s a third strategy that will work well in some situations, but it’s a little bit tricky and doesn’t always get what you’re looking for. It’s called focus and recompose.

Imagine that you’re shooting an image with your subject in the bottom right corner of the frame, and your camera won’t focus on it naturally. With focus and recompose you point your camera directly at your subject, then press the shutter button halfway down so that the camera focuses on your subject. Keep holding the shutter button down while you move the camera back to the composition that you want, then take the picture.

Sometimes this works. It will probably do OK if you’re using a narrow aperture and therefore have a lot of depth of field. If you’re shooting a portrait, or shooting with the lens wide open, you probably won’t get what you’re looking for. Explaining why this is would require you to remember some of your high school geometry and do some math, so I won’t explain the details here. The short answer is that when you move the camera you’re changing the distance to your subject ever so slightly, and that might be enough to make your subject go out of focus.

And there you go– you now have three tricks that you can use for showing your camera who’s boss when you’re trying to focus. I recommend that you go practice each of them, so that you’ll have them ready to go the next time your camera gets some crazy ideas about what to focus on.

Leave a comment

Filed under Autofocus, Lesson

When is autofocus likely to get it wrong?

Most of the time, autofocus will do a really good job of getting your subject in focus. Even though I never put my camera in green box mode anymore, I usually leave autofocus on. I keep an eye on it, though, just to make sure that it’s doing what I want. This is especially true in tricky situations where autofocus might not be smart enough to get me the results I’m looking for.

Here are some situations where just blindly autofocusing might not be your best bet.

Medium f/2

You’re shooting through a fence or other foreground object. If there’s something in the foreground with strong lines, such as a fence, your camera is likely to focus on the foreground object rather than your chosen subject. In this example I’ve manually focused on the container and blurred the fence, but if I’d left it up to the camera I probably would have had a sharp fence and a fuzzy shipping container.

Pistil

Macrophotography. Macrophotography is challenging because you have razor-thin depth of field, so you have to pay careful attention to what parts of the image you want to have in focus. If you let the camera pick out what it wants to focus on, it will probably guess wrong. Serious macrophotographers generally use manual focus for everything.

Copyright Joe Decker, used with permission.

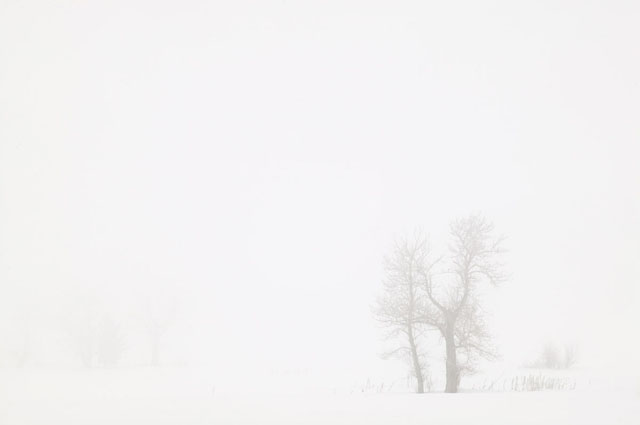
Everything in your image is soft. When everything in your image is cloaked in fog, your camera might not be able to find anything to focus on. This beautiful image from award-winning nature photographer Joe Decker is titled Tree Ballet and Pogonip, and is an excellent illustration of the foggy, soft image. This image is from his series Mono in Winter. See more of Joe’s work at Rock Slide Photography.

Your subject is extremely off-center. Again in Joe’s image, even if the trees hadn’t been shrouded in fog the camera might not be able to focus on them. Autofocus systems tend to be heavily weighted toward the center of the image. If you stick your subject way off in a corner then your camera is probably going to lose this particular game of hide-and-seek.

NoseFocus_f2

You’re shooting portraits. Portraits are often shot with shallow depth of field, but the subject’s eyes should always be in focus. It’s OK for the subject’s nose to be a little bit soft, and the ears can be downright blurry, but the eyes had better be crisp. If you let autofocus have its way then it might decide that it really wants the ears or the shirt or the background to be sharp, and leave the eyes shrouded in some of Joe’s mist. In this particular example, the camera got overly enthusiastic about the sharpness of the bear’s nose.

You’re shooting in low light. Autofocus often has a horrible time finding focus if you’re shooting in very low light. If you can’t see very well, your camera probably can’t either.

Those are some of the key situations where just trusting your camera to get the focus right might not be the best idea. In the next lesson we’ll see what we can do about autofocus problems.

1 Comment

Filed under Autofocus, Lesson

Exercise: Autofocus

Let’s play with our autofocus for a bit to get a feel for how it behaves. To start with, make sure your camera is set to use all of the autofocus points. If you’ve never changed this from the default, you should already have this set up. If you need to change this, consult your camera’s manual for specifics.

First exercise: Find an object that’s maybe three or four feet away from you, has sharp edges, and is reasonably well-lit. Turn the autofocus ring on your lens all the way to one extreme, so that you’re either focused on infinity or as close as your lens will go. Point the camera at the object, look through the viewfinder, and press the shutter button halfway. You should hear the lens whir, and you’ll see the object pop into focus. Pay attention to which of the autofocus points lights up. Now turn the viewfinder all the way to the other extreme and do it again.

Try this with faraway objects and nearby ones until you get bored with it.

Second exercise: Find a well-lit, solid-colored wall. Point the camera at it so that you have nothing else in the viewfinder besides the wall. Press the shutter button halfway and see if you can focus. You might be able to, but chances are pretty good that the camera will try for a while and then give up.

Third exercise: Find a piece of paper with some text on it, and put it somewhere with a decent amount of light. Alternately, you can use your computer screen. Get up close, so that the lens is only a couple of inches away from the print, then push the shutter button to try to focus. You probably won’t be able to. Pull back a couple of inches, and try again. Keep backing up a couple of inches at a time until the lens is able to focus.

So what did we learn?

In the first exercise, you watched the camera focus. Some lenses focus so quickly that you can barely see it happening. Other lenses are much slower and will take a significant fraction of a second to find focus. You got to see which autofocus points the camera used for different situations.

In the second exercise, the camera probably couldn’t find focus. If there were no surface details, the camera wouldn’t be able to find any edges, and therefore it wouldn’t be able to focus. The period of time when the lens was searching for something to focus on is called focus hunting.

Even one small feature like a nail hole on the wall would probably be enough for the camera to focus on.

In the third exercise, you found the minimum focusing distance of your lens. Every lens has a minimum distance at which it can focus, and if you try to focus on something closer it won’t work. Some lenses, especially macro lenses, can focus very very close. Others may require you to be a couple of feet away from your subject. The minimum focusing distance is probably written on the barrel of the lens.

I did this exercise with the Canon 50mm f/1.8 “nifty fifty” lens, which has a minimum focusing distance of 1.5 feet. My most extreme lens, the Canon MP-E 65mm macro lens, has a minimum focusing distance of around one inch. Sometimes a lens will have more than one minimum distance, and a switch that will let you control it– this is called a focus limiter. The Canon 70-200mm f/4L IS lens, my usual telephoto lens, can be set to either 1.2 meters or 3 meters. A focus limiter lets you help the camera focus more accurately by limiting the range at which the camera and lens try to focus. You don’t really need a focus limiter, but in some situations it can be a useful tool.

Now, go out and play! If you have more than one lens, try them all. Try focusing in a very dark room. Try focusing on something that’s not in the center of the image. Make up your own experiments and get a feel for how your equipment works. In our next lesson we’ll use this knowledge to help you focus in challenging situations.

Leave a comment

Filed under Autofocus, Exercise

How Autofocus Works, a really simple explanation

In my last article, I posted this photo and asked you to identify what’s wrong with it:

IMG_3750

As it turns out, this is actually a really easy question to answer– the background of the photo is in focus, but the bear isn’t. Now, I’ll be the first to admit that teddy bears are supposed to be fuzzy, but this isn’t the kind of fuzziness that most people have in mind. The more interesting question here is why the camera got the wrong thing in focus. In order to do that, we have to learn a little bit about how autofocus works.

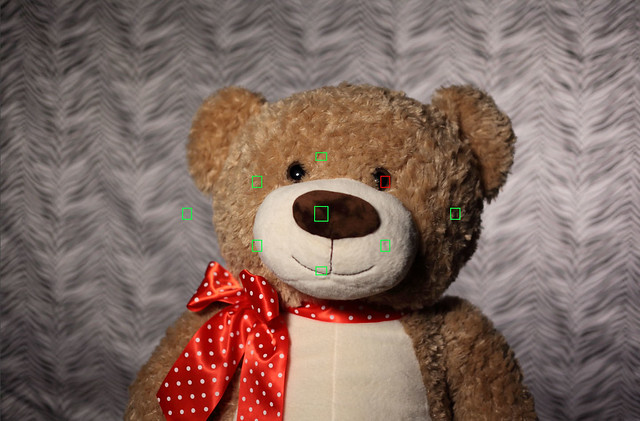
Before we do that, let’s try a little mini-exercise. Pick up your camera. Look through the viewfinder, point it at any interesting subject and press the shutter button halfway. You’ll probably see a display with a bunch of black boxes and some red ones. In this image I’ve colored the black focus points green so that you can see them better. Your camera might only have a few little boxes or it might have lots and lots of them. Those little boxes are called autofocus points:

EyeFocus_focuspoints

So how does autofocus work? It’s a complicated, highly-technical thing, but here’s the simplified one-paragraph version that will tell you most of what you need to know.

When you use autofocus to take a picture, the camera looks at each of the autofocus points and looks for areas of sharp contrast. The camera then changes the focus on the lens just a little bit and checks those points again to see if the contrast is better or worse. It keeps doing this, adjusting the focus a tiny bit each time, until it thinks it has the best focus. Once it does, it takes the picture. There’s a whole lot of black magic going on behind the scenes to make this happen, but that’s the really simple version.

The camera might choose to use all of the focus points if it can. More often, it will use one or a few of them to find the subject. As you’re looking through the viewfinder, the camera will light up an individual focus point if it’s happy with the focus in that area. If your camera is guessing wrong you can boss it around and tell it exactly which points to use, but that’s a subject for a different lesson.

So that’s it– when you autofocus, the camera looks at the areas in the little black boxes and then changes the focus on the lens until it’s happy with the results. That’s not so hard, is it?

2 Comments

Filed under Autofocus, Lesson

When Autofocus Goes Bad

[It’s been a while since I updated Stop Shooting Auto! Too long, in fact. It’s time for me to get back to work, starting now.]

Thus far I’ve written a lot about the things that go into exposure– aperture, shutter speed, ISO. By now you should know a lot about how these things work, what your camera does automatically, and ways that you can be smarter than your camera. If you’re not comfortable with these things yet, go back through the exposure lessons and brush up on the things you’re missing. In particular, at this point you want to have a good handle on aperture and depth of field.

Exposure isn’t the only thing that your camera does automatically though. In almost all circumstances, your camera will also automatically focus for you. This is often a good and wonderful thing, since it makes your life easier, but sometimes the camera gets autofocus wrong. Let’s look at an example.

IMG_3750

This evening I decided to set up the Stop Shooting Auto! Bear Portrait Studio and take some shots. Shooting bears is great for practicing your photographic skills because they’re eminently patient with you and won’t squirm around, fall asleep, or wander off to grab a beer from the ‘fridge.

The setup for the bear portrait studio is pretty straightforward. There’s an extra super ugly backdrop, which in this case is a really tacky sheet hanging from a backdrop stand. In front of that is a bear sitting in a chair. I have a few cheap incandescent lights set up, with two pointed at the backdrop and one on the bear. Finally, the camera is mounted on a tripod. For this example, the camera’s sensor is just under eight feet away from the backdrop. The bear’s eyes are 51 inches from the backdrop. The bear has quite the schnozz on him, as the tip of his nose is four inches in front of his eyes.

(My ethical standards require me to make the following disclaimer: Using a zebra print sheet for a backdrop is a profoundly bad idea, and you shouldn’t do that. Doing so may cause permanent damage to your retinas, or your psyche. Sometimes I think my purpose in life is to serve as a warning for others.)

I’m shooting with a Canon 5D Mark II, and a 50mm f/1.8 lens at f/4.

So, with this setup I took a portrait. Something went horribly wrong, though– the image sucks. Can you guess what the problem was? Click on the image if you want to see larger versions of it.

2 Comments

Filed under Autofocus, Introduction, Lesson

What lens should I use to take a picture of the moon?

A couple of years ago I wrote How to take a picture of the moon.   It was, as you might guess, a lesson on how to take photos of the moon with your dSLR.  You may all now compliment me on my creative and clever naming scheme– I spent hours wordsmithing that one.  It’s my masterpiece.

In it I wrote “The first thing you want is the longest telephoto lens you can get, so that the moon looks like something other than a white dot. 200mm is about the shortest, 300mm is better, and 500+ is even better than that.”  That’s a true statement, but it lacks any substantiating evidence.  As you know, I’m a huge fan of experimentation and examples.  You can probably guess that a longer lens is better for shooting a far-away object, but how much better is it?

A few months ago, my friends at the absolutely fabulous equipment rental company BorrowLenses.com had a crazy sale on super telephoto lens rentals, so I did something I’ve wanted to do for a long time– I rented an obscenely large lens.  Specifically, I picked up the Sigma 800mm f/5.6 super-telephoto lens.

If you’ve never seen an 800mm lens, you should.  This beast is almost two feet long, about six inches across at the front element, and weighs in at a whopping 13 pounds.  It comes in its own well-padded metal carrying case and a sherpa to carry it, and has its own gravitational field.  OK, I made up the part about the sherpa, but it should come with one.  Maybe my trusty Gitzo tripod needs a name?

In any case, the moon.  I timed my rental so that it coincided with the next full moon.  I had an evil plan!  My plan was to steal a bunch of photons from the moon so that I could show you, dear reader, what the moon looks like when captured with various focal lengths of lens.

In order to do this, I packed the following gear:

My plan was simple: I would set up the tripod and shoot the moon with various combinations of lenses and teleconverters to show the image size of the moon with each combination.  For example, I could use the Canon lens at 200mm, and then add a 1.4X teleconverter to show what it looks like at 280mm.  Then I could do it with the 2X teleconverter to show 400mm, and finally with the two teleconverters stacked to show 560mm.  Stacking teleconverters really isn’t a good idea, since it causes your images to get all soft and cuddly, but it’s certainly OK just for demonstrating what the focal length looks like.

When you look at these images, bear in mind that they’re taken with a full-frame camera.  If you have a cropped-sensor dSLR, as most people do, imagine that at portion of the outer edge of each image has been cut off.  This Wikipedia image has a pretty good comparison of sensor sizes.  Look at the APS-C for Canon or Nikon, and that’s about how much you would cut off the edge of my images to get them to look like yours.  All of these images have a full-size version available if you’re logged into Flickr.

200mm 200mm
280mm 280mm = 200mm +1.4X teleconverter
400mm 400mm = 200mm +2X teleconverter
560mm 560mm = 200mm + 2X teleconverter + 1.4X teleconverter
800mm 800mm
1120mm 1120mm = 800mm + 1.4X teleconverter
1600mm 1600mm = 800mm + 2X teleconverter
2240mm 2240mm = 800mm + 2X teleconverter + 1.4X teleconverter

As you can see, longer lenses bring the moon in closer. Even 2240mm doesn’t quite fill the sensor on a full-frame dSLR, although about 1600mm would do so on a cropped-sensor camera.

That doesn’t tell the whole story, though– you don’t have to fill the whole frame in order to get a decent photo of the moon.  If you click through and look at the full-size image taken at 400mm, you’ll see that it has a fair bit of detail in it.  Still, when it comes to shooting the moon, longer is better.  This is one case where size really does matter.

If you decide you want to rent a long lens and try it yourself, I heartily recommend BorrowLenses.  The Sigma that I rented is pretty expensive unless you have other uses for it, but I heartily recommend the Canon 400mm f/5.6L for shooting the moon.  It’s quite reasonably priced for the focal length, and it has very good image quality.  Add a 1.4X teleconverter to it if you need additional length.  It’s also a lot easier to wrangle than the beast.

There are a couple of other things to know.  You really want to use a tripod, or something else to stabilize your camera, when you’re working with long lenses.  This will keep your images from having ugly camera shake.  The downside of this is that the moon moves pretty rapidly through the sky, so if it’s been a couple of minutes since you aimed the camera you’ll probably need to look through the viewfinder again and see if the moon is still in the frame.    Also, working with long lenses can be its own challenge.  One technique is to rest your hand on top of the lens, just above where it sits on the tripod.   This article explains it, and has a great illustration too.

Now what are you waiting for?  Go shoot the moon, and share your images with us.

12 Comments

Filed under Discussion, Equipment