Category Archives: Introduction

I just got a digital SLR. What do I do now?

If you’ve been a very good boy or girl, Santa Claus might have left a digital SLR under the tree for you. Maybe you know nothing at all about photography, or maybe you’ve been shooting with your phone or with a point & shoot camera for a while, and now you have this fantastic new camera. What’s your next step?

A lot of photographers will give you a lot of different advice. Some will tell you that the first thing you should do is read the camera’s manual from cover to cover. Others will tell you that you absolutely have to replace the kit lens with something better. If you have exceptionally smart friends, the first thing they’ll do is send you to this website and tell you to learn about exposure. :-)

From where I sit, they’re all wrong– even the ones who sent you here. Let me explain why.

Reading the manual is great if you already have a good understanding of photography and you just want to know the specifics of the individual camera controls. Even then, it’s going to be way too much information for you to absorb all at once– it will be trying to drink out of the proverbial fire hose. Plus, the manual will tell you what all the buttons and menus and doodads and doohickeys do, but it won’t give you much of an understanding of why you’d want to do any of those things. So do read the manual, but only as much as you need so that you can turn the camera on and take some pictures. Once you get that far, stop reading and put the manual away in a safe place.

People are right that the kit lens that came with your camera probably isn’t very good. Who cares? If you’re a beginning dSLR owner, you won’t be very good either. I wasn’t. You want to see how bad I was? This is the very first image that I took with my first digital SLR.

IMG_0001_obfuscated

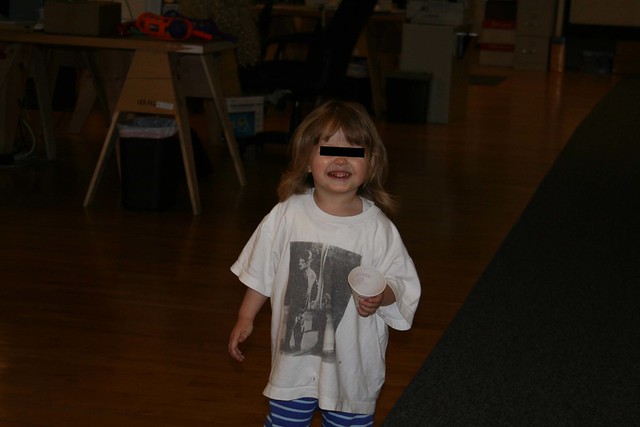
I think she’s the daughter of a coworker, but I’m not sure– hence the black bar on her eyes. It’s a great picture, isn’t it? Yeah, OK, not so much. The second one isn’t much better– it’s a photo of the lens cap. I kept at it, though, and a few months later when I visited Alcatraz and shot this gem:

IMG_0595

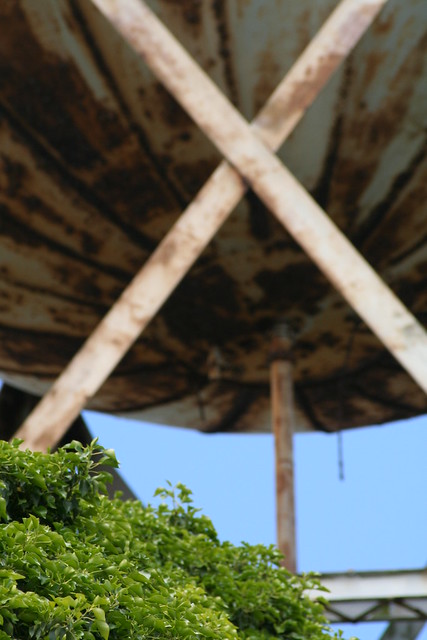
OK, at least it’s properly exposed. The focus leaves something to be desired, though. I think I was trying to capture the geometry of the tank, but I failed miserably.

The general philosophy over here at Stop Shooting Auto! world headquarters is that you should only buy new camera gear when you have a specific need that isn’t being met by your current equipment. If your lens really isn’t good enough, then by all means go invest in a better one. When you’re shooting at this level of competence, though, it’s not your equipment that’s holding you back.

As for reading this website, well… I happen to think it’s a damned fine site full of useful content, and it’s one that every beginner should get to eventually. If you just got the camera, though, you should wait a little bit before you dive in here.

So now that I’ve told you what not to do, I guess I should say something positive. The thing you should do more than anything right now is go take some pictures! The very best way to learn is to go out and practice, and experiment. You’ll get lots of really horrible photos, but that’s OK. Nobody has to see them unless you publish them on the web so the whole world can see how horrible you were when you first started out. (Ahem.)

Spend a few minutes looking at your pictures afterward. Are they good? Bad? What makes the good ones better than the bad ones? Can you identify the problems with the bad ones? You don’t have to know any technical language to do this– your eyes will understand. “This picture is too dark.” “This one is blurry.” “There’s a tree growing out of my friend’s head.” You probably won’t know how to solve these issues yet, but you’ll start to recognize common photographic problems. OK, the tree problem is easy to solve– don’t pose your friend where there’s a tree right behind his head.

After you’ve played around for a bit you’ll start to get a feel for what works and what doesn’t. That’s a good time for you to start reading. Dig into the exposure lessons here, and consult your manual when you need to know the specifics of how to do something on your particular camera. Take the time to do the exercises, since doing something is the best way to learn about it. Keep shooting, and keep experimenting, and eventually you can become a pretty decent photographer.

But for now, stop reading. Stop lusting after equipment. Just go take a bunch of pictures and see what happens.

Leave a comment

Filed under Discussion, Introduction

When Autofocus Goes Bad

[It’s been a while since I updated Stop Shooting Auto! Too long, in fact. It’s time for me to get back to work, starting now.]

Thus far I’ve written a lot about the things that go into exposure– aperture, shutter speed, ISO. By now you should know a lot about how these things work, what your camera does automatically, and ways that you can be smarter than your camera. If you’re not comfortable with these things yet, go back through the exposure lessons and brush up on the things you’re missing. In particular, at this point you want to have a good handle on aperture and depth of field.

Exposure isn’t the only thing that your camera does automatically though. In almost all circumstances, your camera will also automatically focus for you. This is often a good and wonderful thing, since it makes your life easier, but sometimes the camera gets autofocus wrong. Let’s look at an example.

IMG_3750

This evening I decided to set up the Stop Shooting Auto! Bear Portrait Studio and take some shots. Shooting bears is great for practicing your photographic skills because they’re eminently patient with you and won’t squirm around, fall asleep, or wander off to grab a beer from the ‘fridge.

The setup for the bear portrait studio is pretty straightforward. There’s an extra super ugly backdrop, which in this case is a really tacky sheet hanging from a backdrop stand. In front of that is a bear sitting in a chair. I have a few cheap incandescent lights set up, with two pointed at the backdrop and one on the bear. Finally, the camera is mounted on a tripod. For this example, the camera’s sensor is just under eight feet away from the backdrop. The bear’s eyes are 51 inches from the backdrop. The bear has quite the schnozz on him, as the tip of his nose is four inches in front of his eyes.

(My ethical standards require me to make the following disclaimer: Using a zebra print sheet for a backdrop is a profoundly bad idea, and you shouldn’t do that. Doing so may cause permanent damage to your retinas, or your psyche. Sometimes I think my purpose in life is to serve as a warning for others.)

I’m shooting with a Canon 5D Mark II, and a 50mm f/1.8 lens at f/4.

So, with this setup I took a portrait. Something went horribly wrong, though– the image sucks. Can you guess what the problem was? Click on the image if you want to see larger versions of it.

2 Comments

Filed under Autofocus, Introduction, Lesson

Welcome to Stop Shooting Auto!

Stop Shooting Auto! is a set of photography lessons and associated articles, mostly dealing with getting the correct exposure. The lessons are very friendly to beginners who know very little about photography. If you’re scared to take your camera out of green box mode because you have no idea what the controls do, or you don’t even know what green box mode is, this is the site for you.

If you’re new here, you’ll want to start by going through the Exposure Lessons in Order. These lessons are designed to take you from knowing almost nothing to understanding the fundamentals of exposure. Don’t forget to do the exercises so that you practice what you’ve learned. Practicing and experimenting are the best ways to really understand what you’re doing.

Other interesting articles that don’t specifically deal with exposure lessons can be found in the Index of Entries.

Please feel free to ask questions and leave comments– I like getting reader feedback! If you’ve learned something from the site, let me know. And please spread the word, since more readers make me a happy Patti.

7 Comments

Filed under Introduction

If you’re new here

If you’re new to Stop Shooting Auto!, the best way to explore the site is to click the link on the left for exposure lessons in order.  That’s the gentle introduction to exposure that’s the heart of the site.

2 Comments

Filed under Introduction

“How can I help?”

I got email from a reader this week thanking me for SSA!, and asking what they could do for the site. Thanks for asking! I love getting email like this– it makes me feel like I’m helping people.

First off, I’ll never say no to receiving large stacks of cash. If you have a lot more money than you know what to do with, feel free to come by my loft and leave it in my mailbox. I promise to buy lots of excellent camera gear with it. :-)

Seriously, comments and questions on the entries really contribute a lot to the site. Not only do they help me feel like I’m not shouting into the void, but they also give me excellent feedback. If I know where my explanations have worked and what could be clearer I can do a better job in the future. Suggestions for topics let me know what people are interested in learning about.  Constructive criticism is welcome too, of course.  You can keep the hate mail to yourself, though.

Another great way to help is to spread the word.  Tell your friends!  Link to the site. (It goes without saying, but don’t spam.)   Stop Shooting Auto! is still a young site, and publicity is a good thing.  Getting new readers always makes me happy.

Click the links.  I actually make a very tiny amount of money from the site from Amazon product referral links.  As of this writing, I’ve made less than $50– on an hourly basis, that would make me the envy of third-world sweat shop workers.  Clearly, I’m not doing this to get rich!  However, when you buy something from a product link on the recommendation page or What’s in Patti’s camera bag?, I get a few cents from it.  That won’t make me rich, but it makes me smile.

More than anything, though, keep reading and commenting, and let me know how I’m doing.

11 Comments

Filed under Introduction

The Histogram

Hist0873Digital SLRs have a really cool feature that’s often overlooked by novice photographers, but is heavily-used by professionals. It’s the histogram, and it can tell you a lot about how well your image is exposed. I’ll be writing more about it soon.

This histogram came from Photoshop, but your camera should provide you with a similar though probably simpler display on the LCD.

Do you ever use the histogram? Do you know how it works? Have you even noticed that it’s there?

5 Comments

Filed under Introduction

Ten Tips For Your New dSLR

Was Santa Claus good to you? Did you find a new dSLR under the Christmas tree this year? If so, then congratulations! You were definitely a good little boy or girl, and you got a very nice treat. You’re probably excited, but also a little bit intimidated by your new toy.

Here are ten Stop Shooting Auto! tips to get you started with your new dSLR:

  1. Read part of the manual. Your camera’s manual is an invaluable guide to your dSLR, and one that you will be referencing many times in the upcoming months. It has lots of great information in it about how your camera works and what all the settings do. That’s the problem– it has too much information for getting started. If you read the whole thing right now one of two things will happen. Either your head will explode, or most of the information will go in one eye and out the other. Read the beginning of the manual now, enough to get you started with the basics, then set it aside and shoot for a while. Come back to your manual later, after you’ve used the camera for a while.
  2. Take some pictures. Pick a theme, something not too hard, and play around. Maybe you want to take pictures of all your friends making funny faces, the tail lights of all the cars in your neighborhood, or the appliances in your kitchen. It doesn’t matter what you shoot, just do it. You probably won’t get any great masterpieces, but you’ll get some practice with your camera in a slightly structured manner.
  3. It’s OK to use automatic modes. Did I really just say that? Yes, yes I did. Any dSLR has thirteen betrillion different knobs and modes and menu settings and gewgaws and whatchamacallits that you’ll need to learn about. Just like reading the manual, trying to learn about all of the settings at once is going to be too overwhelming. Start off by letting the camera do most of the work for you, then gradually take over the settings as you find a need for them.
  4. Don’t obsess over better lenses and equipment. Right now, people are probably telling you that the kit lens (the lens that came with your camera) is garbage, and you have to get a better one immediately. If you’re a geek, you’re probably poring over reviews in magazines or websites so that you can compare specs and find your next lens. Stop it. The kit lens is a perfectly good starting point, and it will be a while before you find it limiting.
  5. Start making a list of small accessories that you want. OK, this is exactly the opposite of the advice I gave in #4, but it’s a different situation. There are probably a few little things that you’ll want to pick up sometime soon, so make a list as you find them. Do you need a spare battery or charger? Is the strap cutting into your neck? You’ll almost certainly want a bigger memory card at some point. You don’t need to run out and stock up on every accessory in sight, but think about the things that will be useful to you.
  6. Handle your camera with care, but not paranoia. Your camera is a complex, high-tech instrument, but it’s also designed to handle some degree of abuse. You don’t have to baby your camera, but exercise some common sense. Don’t bang it around. Be careful not to get dirt inside the camera. Don’t drop it into the bathtub or run over it with your Range Rover.
  7. Experiment. One of the best was to learn about your camera is to just play around with it. Try zooming in and out on the same scene and see how the image changes. Get down on the ground and look at things from a different angle. Try different modes to see what they do. One of the beautiful things about digital photography is that “film” is cheap, and another is that you don’t have to develop the photos before you can see them. You can try out lots of different things to see what works.
  8. Analyze your shots. One of the other wonderful things about digital photography is that your camera records the settings you used. Photographers used to keep notebooks for the shots they took so that they could record the exposure settings, focal length, etc. Today, you just have to look at some information, called the EXIF data, that’s hidden in each file. Here’s an example. You don’t care about all of the data, but Exposure (shutter speed), Aperture, Focal Length, and ISO Speed are all useful data. The software that you use for pulling pictures off of the camera and viewing them probably has a way for you to see this information.
  9. Find a photography buddy. It can be more fun to shoot with a friend or friends, and you can learn together. Flickr has groups for most cities, and many of those groups get together to share information and go shooting. You’ll get ideas from each other, and pick up interesting tips.
  10. Have fun! If there’s a picture you want to take, take it. Don’t worry about not doing it right or not getting a perfect shot. Play around. Climb up on the playground equipment to get a different angle. Take pictures of bright-colored things just because you like them. Break the rules. I promise that the photography police won’t arrest you for it.

What are you waiting for? Get out there and get shooting.

2 Comments

Filed under Introduction, Stuff

Welcome newcomers!

Stop Shooting Auto! is a set of lessons in exposure, and how to get more out of your digital SLR. Shooting in automatic mode is easier than using Aperture Priority, Shutter Priority, or Manual modes, but it will often not get the shot that you have in your mind’s eye.  I want to demystify the controls on your camera in a way that’s easy to understand, without throwing around a bunch of jargon.

The best way to use this site is to go through Exposure Lessons in Order, and follow along by trying out the exercises. Feel free to skip around, if you’d rather. And please ask questions! Leave a comment if you want to know something or want to add something to what I’ve written.

Leave a comment

Filed under Introduction

If you’re new here

I’ve seen a lot of new traffic here recently. Welcome!

If you’re new here, start with Exposure Lessons In Order to walk through the lessons in the order they were posted. Feel free to ask questions! All friendly comments are welcome.  Play along with the exercises too, since it’s more fun to learn by doing than by reading my ramblings.

3 Comments

Filed under Introduction

Getting Started

My very first 35mm camera was a spiffy Kodak Pony IV that had its very own flip-down leather case. I was 11 years old, and while I thought the camera was cool it was truly mystifying to me. I couldn’t just point it at something and push the button– there were all these controls I had to set. The one that controlled the distance made perfect sense, but the shutter and aperture controls baffled my young brain. What the heck did they do?

The back of the camera had a slot where you inserted an exposure table for whatever kind of film you were using. I think I only had one table, but that seemed OK. I spent a lot of time deciding whether a shot was bright sun, hazy sun, or cloudy bright. I guessed a lot. I got surprisingly not-horrible pictures.

In my high school journalism classes I learned to use an SLR– a Pentax K1000. The Pentax was completely manual, although when it had batteries installed it had a light meter. A light meter! You could look through the viewfinder and twiddle the dials, and a little needle would go up or down to show you when you had the right exposure. I didn’t really understand what the dials were good for, but I sure knew how to put that needle in the middle of the indicator.

In my early 20s I scraped up enough money to buy a Nikon N2000. This was about the time that autofocus cameras started getting popular, but they were comparably expensive. Who needs autofocus anyway? I shot bejillions of rolls of film with this camera and the cheapest lenses I could find, and I bought books on photography so that I could understand what I was doing. I started to grok f-stops and shutter speeds and why they might matter.

In 1995, just before taking off to spend the summer in Europe, I impulse-bought my first digital camera. It was a Logitech Pixtura, which I didn’t know at the time was a rebranded Kodak DC40. I also set up a website to chronicle my travels, and the combination of the two was truly amazing. I could sit on the beach in Cannes and take pictures of my hotel, then dump them on the computer, touch them up, and send them out to the internet for my friends to view. (These days, such a site would be called a blog, though the concept didn’t exist at the time.) While the computer made life wonderful, switching to digital meant that I no longer controlled my exposures like I did with an SLR. Instead, I picked things like portrait or landscape by turning a dial to a picture of a head or a mountain, then let the camera do the work. I could always fix it up later if there was a problem– that’s what the computer was for.

I owned several digital cameras over the years, but a couple of years ago I bit the dust and bought my first dSLR– a Canon Digital Rebel XT. The Rebel did everything automagically, just like my earlier digital cameras. All I had to do was turn the dial to the mountain picture to take landscape photos, to the flower for macros, or to the portrait for people. What could be easier? For maximum laziness, I could just set the camera to fully automatic mode and let it figure everything out. Cameras are smart, and I let mine do all of the thinking for me.

When I looked at my photos they were OK, but very few seemed to be good. Was the camera junk? Was I a bad photographer? I spent a lot of money on this thing, and I wanted it to do better than it was. I thought about my old Nikon and the photos I took with it, and wondered how to get similar quality from the dSLR. Maybe film was just better than digital.

As I was drifting off to sleep one night, the answer came to me. The camera couldn’t read my mind, and it didn’t know much about what I was shooting. All it could do was look at the scene and guess what was going on, but it couldn’t know that I wanted to capture a bird in flight and it had no idea what to do with a sunset. I got out of bed, read the instruction manual from cover to cover, and took the camera out of automatic mode. With practice, my photos improved until I could occasionally get shots that I didn’t hate. I even got a few that I liked quite a lot.

My camera hasn’t been in auto mode since, and I’m much happier. My newest dSLR, a Canon 5D, doesn’t even have pictures of mountains or flowers on the dial. If I want it to be good, I have to work a little bit. I don’t mind.

Enough about me. Let’s talk about you for a minute. You bought a dSLR because you wanted to take good pictures, but you’re just using it as an overpriced point & shoot with interchangable lenses. You want to do better, but you don’t know an f-stop from a bus stop and you’re afraid you’ll get a ticket if you set your shutter speed too fast, if only you knew what too fast was.

Let’s fix that. I’ll do my best to explain the concepts in simple language, and I’ll use lots of illustrations to help make things clear. I’m not a professional and I’m not an expert– I’m basically a photography hacker who isn’t afraid to read and experiment and figure out how it all goes together. I take lots of crappy, badly-focused pictures just like you do. My birds are blurry and my highlights are blown out, and every time that happens I look at the picture and try to figure out what I could have done differently.

Together we can learn what the camera can do and why we might want to twiddle a knob a particular way. Our photos will get better, and maybe some day they’ll even get good. I only ask for one thing– promise me that you’ll take your camera out of automatic mode and keep it out.

Ready? Let’s go.

2 Comments

Filed under Introduction