Category Archives: Lesson

Histogram: What is it?

I confess… I’ve been neglecting Stop Shooting Auto! for a while.  I’ve been traveling constantly for the last couple of months, and that plus a full-time job has kept me quite busy.  In fact, I’m writing this while sitting at SFO while I wait for my delayed flight to take off.

AverageImageHistogram I promised I’d address the histogram next, so let’s do it.

Maybe you’ve seen something that looks like this, either in Photoshop or other image editing software, or on your camera when you reviewed an image.  Maybe you even took a guess at what it is and how it works, and if you did you probably guessed right.  That’s the histogram.

Histogram is a scary, technical-sounding word, but it’s actually a really simple concept.  The histogram is just a graph of how many dark and light pixels there are in your image.  At the far left you’ll see how many dark pixels there are, then moving to the right you’d see count of lighter and lighter pixels until the far right was pure white pixels.

AverageImageIn the histogram above, you can see that there are a very few solid black pixels, lots that are a little bit darker than average, a bunch that are a little lighter than average, and a chunk that are pure white. Let’s look at the image and see what it looks like.

There are a few pure black or very close to black pixels, mostly around the trash can and along the left wall– that’s the tiny hump on the far left.

The pure white pixels are mostly on the sign, in particular the words “San Francisco Marketplace” are pure white, and a tiny bit overexposed.  That’s the vertical bar right along the far right edge.

The dark of the sign, the dark carpet, and the dark part of the wall are the peak on the left. The peak on the right is the lighter part of the walls.

Most histograms that you will see don’t take color into account, only brightness.  That means that a very bright blue will look just like a very bright white.  Some cameras have the ability to do histograms with the colors separate, and of course most postprocessing software can do so as well.

DarkImageHistogramThis one is kind of fun. Without seeing the image, what can you tell me about it?  Obviously you can’t tell me what it’s a picture of, but can you make any guesses about what the image looks like?  Is it light or dark?  Does it have lots of different shades or only a few?  Are there any pure black or pure white areas in the image?

Do you think this image is well-exposed, underexposed, or overexposed?

OK, they’re calling my flight now.  Ciao!

2 Comments

Filed under Exposure, Lesson

April Homework Extension

Very few people did the April homework assignment, so I’m extending it until the end of May.  Grab your cameras and go capture something in motion!  There’s a prize, of course– a signed Flower Porn print, and two if enough people participate.

If you’re new to Stop Shooting Auto! or you haven’t done so before, you’ll want to start by going through the exposure lessons in order.  That will give you a gentle, beginner-friendly introduction to the principles of exposure and the way your camera’s controls work.  Don’t be afraid to ask questions and leave comments… I love getting them, and I’m happy to answer as many questions as I can.

4 Comments

Filed under Lesson

Someone did their homework!

Someone at SFGate.com seems to have done their homework and captured something in motion.   Why haven’t you?

I’ll extend the deadline for a little while, but the challenge is simple– capture something in motion.  Go here for full details of the homework assignment.

1 Comment

Filed under Lesson

We have a winner!

Tyler's FlowerCongratulations to Tyler, who won the drawing for the March homework assignment. For being favored by my computer’s random number generator, he wins a signed print from my Flower Porn series.

I was impressed with the submissions– you guys really understood what it took to blur your backgrounds. There were adorable dogs, jewelry, walls, lots of flowers, and plenty of other interesting subjects. The bell was a fascinating and slightly nontraditional composition. Of all of the submissions, I think the bouillon was my personal favorite for moodiness and interesting lighting.

Everybody seemed to understand that the right way to do this was to use a very wide aperture, and almost everyone shot in aperture priority mode. Several people mentioned changing the ISO to get a better shutter speed. A couple of you even mentioned moving closer to your subject in order to get a more desirable depth of field– that’s an excellent technique!

If you learned just one thing from this assignment, I hope it was this: visualize the image before you shoot, and then figure out how to use your camera to capture the picture that’s in your mind. Digital cameras make it very easy to just shoot lots and lots of images until you get lucky, but just a little bit of skill and forethought will do much better.

IMG_9209A print of this image will be in the mail to Tyler soon. And get ready, because the April homework is on its way. It might be a little bit more challenging, but it will also allow a lot more creativity. I’m really looking forward to seeing what you guys do with this one, since the March entries were all great.

Thank you all for contributing!

2 Comments

Filed under Lesson

How To Clean Your Sensor

In Why are there spots on my picture? I showed several examples of sensor dust, and promised to tell you what to do about it. And then I procrastinated. No more! Here’s my simplified guide to cleaning your sensor.

Before I go very far, let me say this: whenever you clean your sensor, you run some risk of damaging it. If you’re careful and pay attention to what you’re doing that risk is very small, but if you’re not comfortable with the methods outlined here then you should take your camera to a reputable camera shop rather than doing it yourself. The author disclaims all responsibility for any damage you might do to your camera.

Have I scared you? Sorry about that. I’ll do my best to make you less scared. Some methods of cleaning the sensor are far safer than others, and those will do a good job on most dust. Occasionally you’ll wind up with really stubborn, sticky dust that can’t be removed without heavy artillery, but the vast majority of it is pretty wimpy and will go away when you tell it to.

Before we go on, there’s one tool that you’ll need for this project, and that’s some sort of a blower bulb. This is a small rubber gizmo that you will use to blast the pesky dust away from your sensor. The most popular one for this purpose is the Giottos Rocket Air Blaster, and I’m quite fond of mine. It’s powerful and works extremely well, and you get all of that wonderfulness for less than ten bucks. Another option is to go to the drugstore and pick up a bulb-style ear syringe. These cost a couple of bucks and will do a passable job, though the Giottos really is much better.

Before you attempt to clean your sensor, read your camera’s manual for instructions on sensor cleaning. My Canon manuals say to always have a fully-charged battery or have the camera plugged into an AC adapter when you clean the sensor. I don’t know much about Nikons or other dSLRs, but I’d imagine they’re the same.

Here’s a quick outline of what we’re going to do:

  • Figure out how to put your camera into cleaning mode
  • Take the lens off of the camera
  • Put the camera into sensor cleaning mode
  • Quickly blast the dust off of the sensor
  • Turn the camera off to get it out of cleaning mode
  • Put the lens back on

That doesn’t sound too hard, does it? OK, let’s go.

First off, read the manual and then look through your menus to see how to put the camera into sensor cleaning mode. You don’t want to put it into this mode yet, but you know where the setting is and be ready to go.

The next step is so obvious that it doesn’t require explanation– remove your lens. I make it a habit to always keep the opening of the camera body pointed down whenever I don’t have a lens on the camera– this utilizes an amazing force called gravity to help keep dust out of the camera. It probably doesn’t do all that much good, but every little bit helps.

Now, have your blower bulb handy, then put the camera into sensor cleaning mode. You should hear the mirror flip up so that the sensor is accessible.

Bulb CleaningHere comes the fun part: keep holding the camera so that it’s facing down, and use the blower bulb to blast air onto your sensor a few times. This should dislodge most of the dust that’s hanging around. If you keep the opening pointed down, that gravity stuff will help keep the dust from falling back onto the sensor. Work quickly, but don’t hurry… it’s better to have to repeat the process a second or third time than to work too fast and bump something you shouldn’t.

Now, turn the camera off to take it out of cleaning mode, or alternately do whatever your manual told you to do. Put the lens back on the camera so that you don’t let more dust in.

A few words of caution:

  • Be careful! You don’t want to touch anything with the tip of the blower.
  • Do this in as dust-free an environment as possible
  • Absolutely do not use compressed air for this– it contains propellants that you don’t want inside your camera

When you’re done, take another test shot and you should see that much of the dust is gone. You almost certainly won’t get all of it, but that’s OK– I don’t think I’ve ever had a completely dust-free sensor in my life. Small amounts of dust are impossible to see in most images, and when they do show up it’s almost always possible to get rid of them with a tiny amount of Photoshopping.

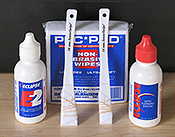
What if you have serious stuck-on dust that won’t go away? There are several methods at your disposal that require a bit more caution than a blower bulb but can remove even the most stubborn dust. Probably the best is wet cleaning. This is done with materials that are specially designed to avoid leaving residue on your sensor. (Please put that Windex down right now.) The kit I have is sold by Copper Hill Images, and I’ve been quite pleased with it. I do most of my cleaning with a blower bulb, and when that doesn’t work I resort to wet cleaning. Copper Hill has an excellent tutorial on using their products– it’s a bit chatty, but contains a lot of good information.

Another method that some people swear by is a specially-designed electrostatic brush. I personally haven’t had very good luck with cleaning brushes, but that may just be my incompetence with using them. Your mileage may vary.

The Dust-Aid kit is an interesting new product– it uses a special adhesive pad to clean the dust off of your sensor, sort of like a lint roller for your sensor. I haven’t used one yet, but I’ve heard mixed reviews. My guess is that they’ll be somewhat more thorough than a blower, and not quite as good as wet cleaning.

Sensor cleaning has been written about a lot, and everyone has an opinion about it. If you do a web search for “cleaning dslr sensor” you’ll find a lot of excellent advice and a wide variety of opinions. To my way of thinking, the blower bulb method is the least invasive and should always be tried before you go onto something more hardcore.

Many new cameras try to automatically clean the sensor by vibrating it every time the camera is turned on or off. I don’t have personal experience with those, but others have reported that camera self-cleaning will reduce the amount of dust you get, but won’t completely eliminate it. You’ll still need to clean your sensor by hand from time to time.

Do your best to prevent getting dust into your camera– always keep a lens or a body cap on the camera, and when you change lenses do it quickly with the camera pointing down, and in as clean an environment as possible. However, when the inevitable dust shows up and starts causing problems, it’s not the end of the world.

9 Comments

Filed under Equipment, Lesson

Shooting Through a Fence

In the last lesson, I talked about shooting at the zoo under difficult circumstances and how to break the problem down into manageable pieces. One of the problems that TJ faced was that there was a fence between him and the subject. I promised to take a few sample shots through a fence and show what effects different apertures had on the image.

The following images were all shot with a Canon Digital Rebel XT and the Canon 50mm f/1.8 lens, also known as the nifty fifty. I chose it because I wanted to be able to open up the aperture in order to blur the fence as much as possible. Here are three sets of images that show how the fence looks from different distances at different apertures. I apologize for not finding more interesting subjects, but these were taken during a quick stop at the Port of Oakland when I was late for work.

In the first set, the camera is just a couple of inches from the fence. The camera was in aperture priority mode, and the four shots were taken at f/2, f/4, f/8, and f/16. As you can see, at f/2, the fence blurs so much that it’s essentially invisible. At f/4, you can start to see the fence blurring parts of the image. At f/8 the fence is quite visible, and at f/16 it’s almost sharp.

Close f/2 Close f/4
Close f/8 Close f/16

This time, I’m standing about an arms length away from the fence.  At f/2, the fence is just a blurry grid.  At f/4 it starts to look like a fence, at f/8 it’s clearly a fence, and at f/16 it’s fairly sharp.

Medium f/2 Medium f/4
Medium f/8 Medium f/16

In the final set I’m standing about five feet away from the fence, and also at a slight angle.  At f/2 the fence is a blurry mess, at f/4 it starts to sharpen up, and at f/8 and f/16 it’s sharp enough to work as part of the image rather than being a flaw.

Far f/2 Far f/4
Far f/8 Far f/16

Conclusion: if there’s a fence in your way, figure out what you want to do about it and adjust accordingly.  If you want to make the fence disappear, get as close to it as you can, and open up your aperture as wide as possible.  If you want to use the fence as part of the image, back up a bit and stop down.

3 Comments

Filed under Discussion, Lesson, Question

Question: Shooting At The Zoo

I recently got an excellent reader question from TJ. It was such a great question that I thought it deserved its own entry, rather than being buried in comments.

Patti, I had a really frustrating experience last year when I attempted to take pictures at a zoo. Most of the occupants were birds and were housed behind 1″ grid wire. Frequently, they were shaded and I (and the camera) were not. Sometimes they were moving. Sometimes I had to shoot up into a tree and the sun was shining directly into the lens. Often, my camera wouldn’t focus, so I had to shift to manual focus. Sometimes, it wouldn’t even snap the picture when I was doing the focusing. I have a Nikon D70s. Might you give some tips on what I could’ve been doing wrong and how to shoot these types of pictures better?

IMG_2095TJ, that’s a really hard set of circumstances to work under, because you have so many things working against you. This is exactly the sort of situation that will confuse automatic modes on your camera, and require you to switch to manual settings in order to get good shots. I’m not sure I have a magic formula, but let me see if I can break the problem down and show you how I’d think about it.

First the fence. It’s going to do two things– get in the way of your shooting, and confuse your autofocus. Switching to manual focus is a great way to solve the latter problem, since you’re smarter than the camera is and you know to just ignore the fence. Once you’re in manual focus, you have two choices on how to deal with the fence– you can either stand back and use the fence as part of the composition, or you can put the lens up against the fence and shoot between the grids. Using a wide aperture will help the fence blur and fade out of the picture, especially if you’re close to it.

Medium f/8Here’s where things are going to get hairy and conflict with each other. You’re manually focusing on a moving target, so you sort of want to leave yourself some room for error– if you have a lot of depth-of-field, you’ll still have the bird in focus even if he starts moving. However, that’s in direct conflict with wanting to use a wider aperture to make the fence fade away. I would probably opt for using something like f/5.6 (I originally said f/11, but in retrospect I think that’s probably not the best answer) and then get as close to the fence as I could, but I’d play around with it and see what worked for that particular situation.

Once I found an aperture that I liked, I’d try to find the best shutter speed that worked with it. If I couldn’t get a fast enough shutter speed to capture the birds well, I’d increase the ISO until I did. If that still didn’t work, I’d open up the aperture until I found something that worked. There’s a pretty good chance that the camera’s metering will be confused here, so use it as a starting point rather than a final answer.

This is one of those places where digital has a huge advantage over film– you can try out the shot and see how it works. The birds aren’t going anywhere, so you can afford to spend a few minutes setting up a few shots and seeing what works, then making adjustments. Whenever I’m shooting under tricky lighting conditions, I always do a few test shots beforehand so that I can get my camera set up the way I want it.

Backlighting, especially shooting into the sun, is just hard. Don’t forget that your feet are an invaluable photographic tool. If you can’t get the shot because the sun is right in front of you, take a few steps. You’ll probably be able to find a better angle on your subject. If you’re close enough that you can use a flash to fill in some front light, that often works very well.

I haven’t used a Nikon dSLR, so I don’t know what will stop it from taking a shot. I know that my Canon will stomp its foot and get pouty if it can’t focus, but if I put it into manual focus it will shoot with the lens cap on in all exposure modes.

After I answered this question, I went out and took a few photos through a fence, to see what the fence looked like at different apertures and distances.  I’ll post them as a separate entry.

By the way, the bird photo at the top of this entry was taken at the St. Louis Zoo a few years ago, shortly after I got my first dSLR.  I can’t remember much about the photo, but it was taken through either glass or a fence in auto mode.  I included it partially because it matched the subject matter, but mostly to remind myself that just a little while ago all I really knew how to do was point the camera at something and hope for the best.

Leave a comment

Filed under Lesson, Question

What is focal length?

It happens to most dSLR owners. You get the camera, and you’re thrilled with it, but you’re also awed and a wee bit afraid because the whole thing is just so confusing. It doesn’t take very long before someone tells you that the kit lens, the lens that usually comes with the camera, is a piece of garbage. This sends you off to the web to find a better lens, but there are all sorts of complicated and cryptic numbers and letters and symbols and the like. The whole thing is so bewildering that you just want to go to the drugstore and buy a disposable film camera.

Don’t fear! The cryptic numbers and letters that are used to describe lenses are really (mostly) pretty straightforward. If you’ve been reading this blog, you’ll probably find that you’re already familiar with most of the terms, so this won’t be too hard.

Before we start looking at lenses, there’s on term that I may not have explained yet– focal length. In a nutshell focal length is how long the lens is. It’s a little bit more complicated than that, of course, and the technical definition isn’t all that interesting, but there is really only one thing you need to know, and it’s really easy. The longer your lens is, the more the image is magnified.

Let’s say that you’re taking a picture of the tree in your yard, and there’s a bird perched on a branch. If you use a short lens, you’ll get the whole tree into the picture, and the bird will be a tiny little blob. If you use a long lens, you’ll just get the bird and the branch that he’s sitting on, and you’ll be able to tell that he’s a blue jay. If you have a really long lens, you’ll be able to see the worm in his mouth. Cool!

If you have a zoom lens, and you probably do, you’re probably already familiar with this concept. Zoom in and everything gets closer. Zoom out and you get more of the area in the picture.

Polar Bear by Joe DeckerLong lenses are called telephoto lenses. The prefix tele- means distant, so telephoto lenses let you take pictures of distant things. This amazing shot of a polar bear, taken by award-winning nature photographer Joe Decker, was taken with a telephoto lens. Joe’s a smart guy, and he knows if he gets too close to a bear he runs the risk of being dinner.

Bryce Canyon Sunrise by Joe DeckerShort lenses are called wide-angle lenses, because they let you get a really wide view of your surroundings. Again, I’ll use one of Joe’s photos, this one a sweeping view of sunrise in Bryce Canyon. I honestly don’t know what lens was used for this shot, but the only way to get such a grand vista is to use a wide-angle lens.

Here’s what you should remember about focal length: using a wide-angle lens is like stepping back from the picture so that you can see more of the action, while using a telephoto lens is like walking over to the subject so you can get a closer look. That’s really all you need to know for now.

Once again, I’d like to thank Joe Decker for giving me permission to use his images as examples. I highly recommend checking out his work, especially some of his recent images from Iceland and Greenland.

In the next lesson, I’ll take a closer look at a couple of lenses and explain what all of the numbers mean.

Leave a comment

Filed under Equipment, Lesson

How to take a picture of the moon

If you’re in a hurry you can ignore the discussion and skip straight to the summary


moonSince a couple of people have requested this, here’s the Stop Shooting Auto! lesson in shooting the moon.

Back in the olden days, when cameras were carved out of stone and didn’t have whizbang light meters and dozens of confusing exposure dials, photographers had to choose their settings manually. In fact, my first 35mm camera, a Kodak Pony IV, had printed inserts that went into a slot in the back of the camera to help you pick your settings. For bright sunlight you used this, for cloudy bright you used that, etc. And horror of horrors, there was no Photoshop– if you screwed up the exposure, you had to try to fix it in a (gasp) darkroom. And that was if you were lucky– most people just lived with whatever bad photos they took.

GreenCheeseBack in these dark, dark days, photographers often relied on rules of thumb to help them choose their exposures. The most common of these was called the Sunny f/16 Rule. The rule went like this: for objects that are brightly lit by the sun, set your aperture to f/16. Set your shutter speed to 1/ISO of the film. (Film? Do you remember that?) So if you were shooting with ISO 100 film, you’d set the camera to f/16 and 1/100 sec, or as close to that as you could get. At ISO 200, it was f/16 and 1/200 sec.

I know what you’re thinking. That’s great, Patti. Thanks for your little stroll down memory lane, but someone has been spiking your Geritol. I want to photograph the moon, and I want to do it at night when it’s dark out. Why would I care about sunny days?

Here’s a little secret. The moon is nothing more than a bright object lit by the sun. Sure, it’s in a dark sky and everything around you is dark, but the moon is surprisingly bright. However, it’s also pretty far away, and that makes it look pretty small in the sky and even smaller through your camera’s lens. Unless you have a very long telephoto lens, your camera’s meter just won’t know what to do with the shot. If you’ve tried to take a picture of the moon in automatic mode, you probably got a small white dot on a dark but washed-out background. We can fix that, but it will mean putting your camera in manual mode. I hope that’s not as scary to you as it would have been before you started reading this blog.

Let’s go back to that telephoto lens thing for a moment. The first thing you want is the longest telephoto lens you can get, so that the moon looks like something other than a white dot. 200mm is about the shortest, 300mm is better, and 500+ is even better than that. If you don’t have a long lens, a teleconverter is a useful accessory to have. In a nutshell, a teleconverter is kind of like a magnifying glass added to your lens. With a 1.4x teleconverter, a 200mm lens acts like a 280mm lens, and with a 2x teleconverter, a 200mm lens acts like a 400mm lens. There are some serious downsides to using teleconverters, but they can also be useful tools.

[Update: I’ve recently added an article titled What lens should I use to take a picture of the moon? It has examples of moon shots at focal lengths from 200mm to 2240mm.]

Something To Howl AtOK, so you have your longest lens out. You might want to use a tripod too, lean the camera against a wall or something to stabilize it. What settings should you use?

First off, use manual focus. Because the moon is pretty small in your viewfinder, many cameras have trouble focusing on it. If yours works in autofocus that’s great, but if not just switch to manual focus and do it the old-fashioned way.

In my experience, the Sunny 16 Rule is close but not quite right for the moon. The best settings I’ve found seem to be around ISO 100, f/11, and 1/100 sec. However, sometimes something a little slower or faster does a better job. Because of this, I recommend doing something called bracketing. Bracketing is just a fancy term for taking a bunch of shots at slightly different exposures so that you can pick out the best one.

Set your camera for manual mode, ISO 100, f/11, and 1/100 of a second. Take a picture. Now without changing any other settings, set the shutter speed to 1/200 and take another picture. Do the same thing at 1/400. When you’ve done those three, go the other way. Set the shutter speed to 1/50 and take a picture, then 1/25. If you aren’t using a tripod, don’t forget to brace the camera against something solid like a wall or a pole, so you don’t get camera shake. And voila! One of those is probably a pretty good shot of the moon.

To summarize:

  • Manual mode, at f/11 and ISO 100
  • Focus manually
  • Use a tripod or stabilize your camera against a sturdy object like a wall
  • Start at 1/100 sec and take a shot
  • Bracket a couple of shutter speeds faster and slower (e.g., 1/60, 1/30, 1/200, 1/400, or whatever speeds are closest to those on your camera)
  • Look at the images on your computer and pick out the best one

The next time you have a clear, dry night and the moon is in the sky, try it yourself.

And here are a few products that may be useful in shooting the moon:

Tamron 1.4x Pro Teleconverter for Canon cameras

Tamron 1.4x Pro Teleconverter for Nikon cameras

The Tamron pro series of teleconverters are optically quite excellent.  Their physical geometry makes them work with most telephoto lenses (at least on Canon… I’m less familiar with Nikons), and they give you a fair bit of extra focal length to bring the shot in closer.

Canon RC-1 Wireless Remote Control

This little gizmo is amazing.  It lives on the strap of your camera, completely out of your way, but just waiting until you need it.  When you do, pop it off and voila– you have a wireless infrared remote.  It works with most Canon dSLRs, it’s inexpensive, and it’s incredibly useful.

108 Comments

Filed under Exposure, Lesson

How the settings play together

After trudging through all those scary numbers, we now know that ISO 200 is twice as fast as ISO 100, that 1/60 second is half the time of 1/30 second, and that f/4 is twice as fast as f/5.6. If I did my job well, we even learned that without anyone’s brain dripping out of their ears and onto their keyboards.

Note: the word “fast” in photography generally means “captures more light” when it’s talking about ISO or aperture.  When talking about shutter speed, though, “faster” means just the opposite– 1/60 is faster than 1/30, but 1/30 lets in twice as much light.  It’s confusing.

What might or might not be obvious now is that we can change two different things and keep the exact same exposure. For example, each of these settings will produce the exact same exposure:

ISO 100 f/4 1/60 sec baseline
ISO 100 f/2.8 1/120 sec faster (wider, more light) aperture, faster (less light) shutter speed
ISO 200 f/4 1/120 sec faster ISO, faster (less light) shutter speed
ISO 200 f/5.6 1/60 sec faster ISO, faster (wider, more light) aperture
ISO 400 f/5.6 1/120 sec ISO four times as fast, shutter speed twice as fast (less light), aperture half as fast (narrower, less light)

The first line is our baseline measurement. On the second one, we opened up the aperture wider to let more light in. In order to keep the exposure constant, we need to capture less of the light, so we keep the shutter open for half as long.

On the third and fourth lines, we increase the ISO, which records more light To balance it out, we either keep the shutter open for less time, or we make the aperture smaller– either of those will let less light in.

The fifth line is tricky! We’ve quadrupled the ISO, which means we’ve increased it by two stops. In order to compensate for that, we made the aperture smaller by one stop and we also made the shutter speed faster by one stop.

The fancy technical term for this is reciprocity– it really just means that if you change one setting, you can balance it out by changing another one, and get the same result.

So how would you use this? Here’s an example. Let’s say you’re taking a picture of a group of people, some of them standing behind the others. You put the camera in aperture priority mode and pick f/4 and ISO 100. When you try to take the shot, you find out that the best shutter speed is 1/30, and that’s too slow for you to hold the camera steady– you need at least 1/50 sec. What do you do?

Well, you can try using f/2.8 and 1/60. That will get you the same exposure, but at a faster shutter speed. But wait… now you’re at f/2.8, and when you focus on the front row of people the back row is out of focus, or vice versa. You really need f/4 to get everyone in focus.

Finally, you set the ISO to 200, which lets you use an aperture of f/4 with a shutter speed of 1/60. Voila! You get your shot.

The way exposure settings play together is a little bit like having a squishy ball in your hand. When you squeeze one part to make it smaller, another part gets bigger. Squish two parts, and the third one gets a lot bigger. Squish squish squish.

Easy, huh?

22 Comments

Filed under Aperture, ISO, Lesson, shutter speed