On a Flickr discussion the other day, someone asked what the best way was to control and improve the limited depth of field when shooting with a macro lens.
 In case you’re not familiar with the term, macro photography is very close-up photography. Technically, it’s photography where the size of the image on your sensor is at least as big as real life, but most people use the term more loosely. I’m not interested in picking technical nits here, so I won’t be picky.
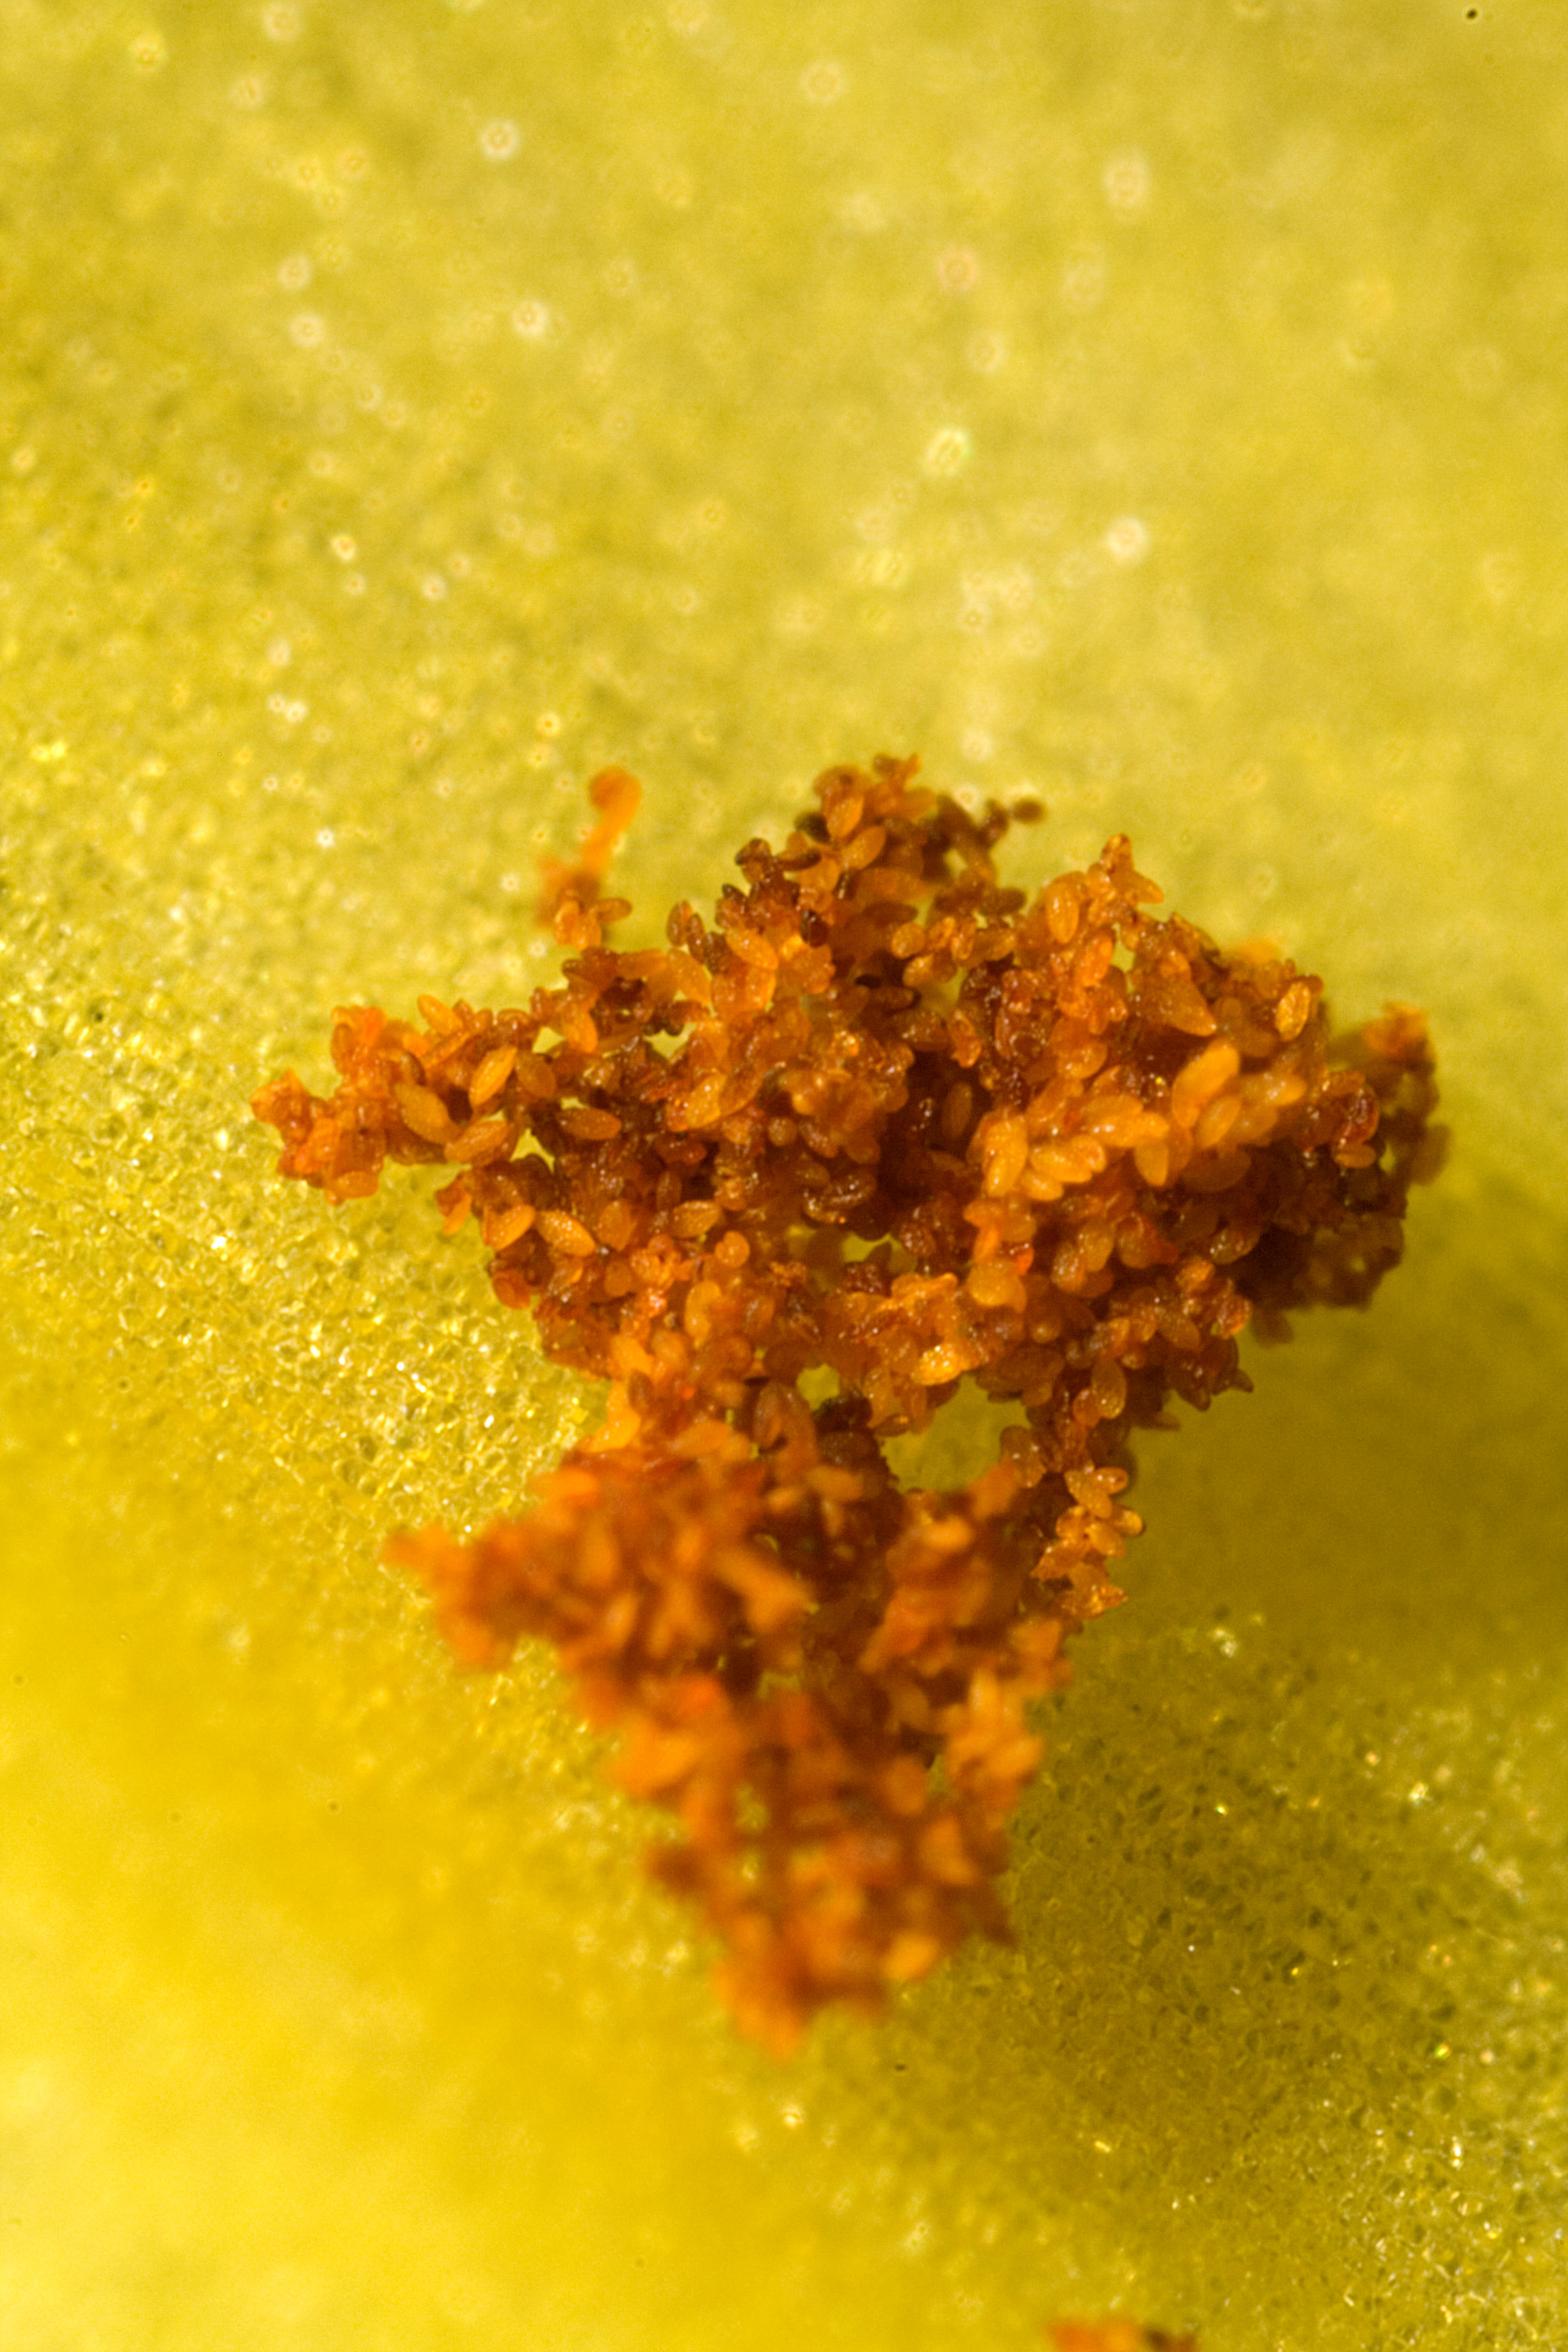
If you’ve ever done any macro photography, you know that getting your whole subject in focus can be tremendously challenging. When you’re shooting macro, your depth of field is extremely tiny, often measured in millimeters or fractions of millimeters. Just a little bit of movement from you or your subject and everything goes to out-of-focus hell in a windblown handbasket. Even when you have a perfectly still subject and your camera rests firmly on a tripod, shooting your subject at the wrong angle will get you in trouble. For an extreme example, check out the larger version of the grains of pollen on the left. The camera was at a slightly different angle than the pollen, and you can see the changes in focus at the top and bottom of the photo. (You can also see some excellent examples of sensor dust if you look closely at the top right and bottom left corners.)
Back to our question: how do you control depth of field when you’re shooting macro? My response on Flickr was that you do it in exactly the same ways that you do for any other shooting:
- choose your aperture wisely
- manage your camera-to-subject distance
- choose your focal point wisely
- when you can, use depth of field preview to check your image before you shoot
We should all understand the first one by now– choose your aperture wisely. If you’re new to Stop Shooting Auto! and you aren’t completely familiar with aperture and how it works, you should go reread this lesson and the few that follow it. In short, choosing a wide aperture (a low-numbered f-stop like f/4) will give you a very shallow depth of field. Choosing a narrow aperture (a high-numbered f-stop like f/16) will get you much more depth of field.
Don’t forget that there’s an online depth of field calculator that you can use. If you click around on that site you can also find a PC version, an iPhone version, a PalmOS version, and several other tasty tidbits.
People often overlook the camera-to-subject distance when they think about depth of field, but it’s a key parameter. Try pulling up the DOF calculator and enter the following values:
Camera format: Canon Digital Rebel, XT, XTi, XS, XSi
Focal length: 100mm
Selected f-stop: f/11
Subject distance: 30cm
Note that 30cm is right about one foot. Click the calculate button, and you’ll see that your depth of field goes from about 29.9cm to 30.1cm, for a total of .26cm. That’s about two and a half millimeters, which doesn’t leave much margin for error.
Leave everything the same, but change the subject distance to 60cm. Now, your depth of field is from 59.4cm to 60.7cm, for a total of 1.29cm. That’s still not a whole lot, but it’s almost five times what you had when you were a foot away. Try it at more normal focusing distances, like ten feet and twenty feet, and you’ll see that even there, doubling the distance between the camera and the subject gives you about a 4x increase in your depth of field. In short, if you’re having trouble focusing, move back.
 Choosing your focal point can make a huge difference when you’re working with limited depth of field. It’s often true that your camera can do a better job of focusing than you can, but it can’t choose what to focus on. If you really care about a certain part of the image being in perfect focus, your best bet is to put the lens into manual focus mode and do it yourself. This will give you absolute control over where you’re focusing.
In this image, letting the camera focus might well have meant that it chose to focus on a deeper part of the spadix (the sticky-outy part for non-botanists), leaving the tip out of focus. This might have been an interesting effect, but it wasn’t what I wanted.
Don’t forget the depth of field preview button on your camera. If you have a shot lined up, and you want to see how much of it will be in focus, press the depth of field preview button. The viewfinder will get darker, sometimes very dark, but if you have enough light on your subject you can probably squint and get a good idea of how much of the image is in focus.
If you just can’t get enough depth of field, there are a couple of things you can do. First, you can add more light to the subject. I often use desk lamps for macro work, since I can aim the light wherever I want it. Flashes are always an option, though they can be challenging to use. If you’re outdoors, get your subject out of the shadows, or use a white reflector (even a piece of paper will work) to reflect light onto the subject.
Putting your camera on a tripod will let you use a longer exposure, and therefore a smaller aperture. This only works for subjects that are stationary, though– don’t try it with moving objects or you’ll wind up with a blur.
And finally, if your camera is parallel to your subject it will be easier to get the image in focus. If your subject is at an angle to the front of the lens, move the subject and/or the camera to get a better angle. Look up at the pollen photo for an excellent example of what happens when you get this wrong.
While depth of field issues make macro photographers pull their hair out (and then photograph the strands), it’s challenging in lots of other situations as well. Learn to control it and you’ll have a powerful tool for taking better photos.


