Category Archives: Exposure

What is Exposure Compensation?

I have new kittens!

I’m not normally one of those people who takes hundreds and hundreds of pet photos, but I’m not completely immune either.  This evening I turned around and saw them sitting on top of the cat tree looking utterly adorable.  I also happened to have my 5D Mark II sitting on my desk, with a 580EX flash and a Sto-Fen Omni-Bounce diffuser attached.

If you’ve ever been around kittens, you know that they’re not terribly prone to sitting still for very long.  I slapped the camera into P mode, turned the flash on, and started shooting.  After a few shots, I looked at one of the images:

We're cute and underexposed

Yuck! Underexposed. I’d put the camera into P mode because I was in too much of a hurry to think about the proper settings for flash (which I almost never use), but I’d forgotten that the diffuser I was using steals light. You know how frosted glass doesn’t let as much light through as clear glass? The same thing happens with the translucent plastic of the flash diffuser. It does a great job of softening the harsh light of a flash, but it also means that your images will be underexposed if you don’t do something about it.

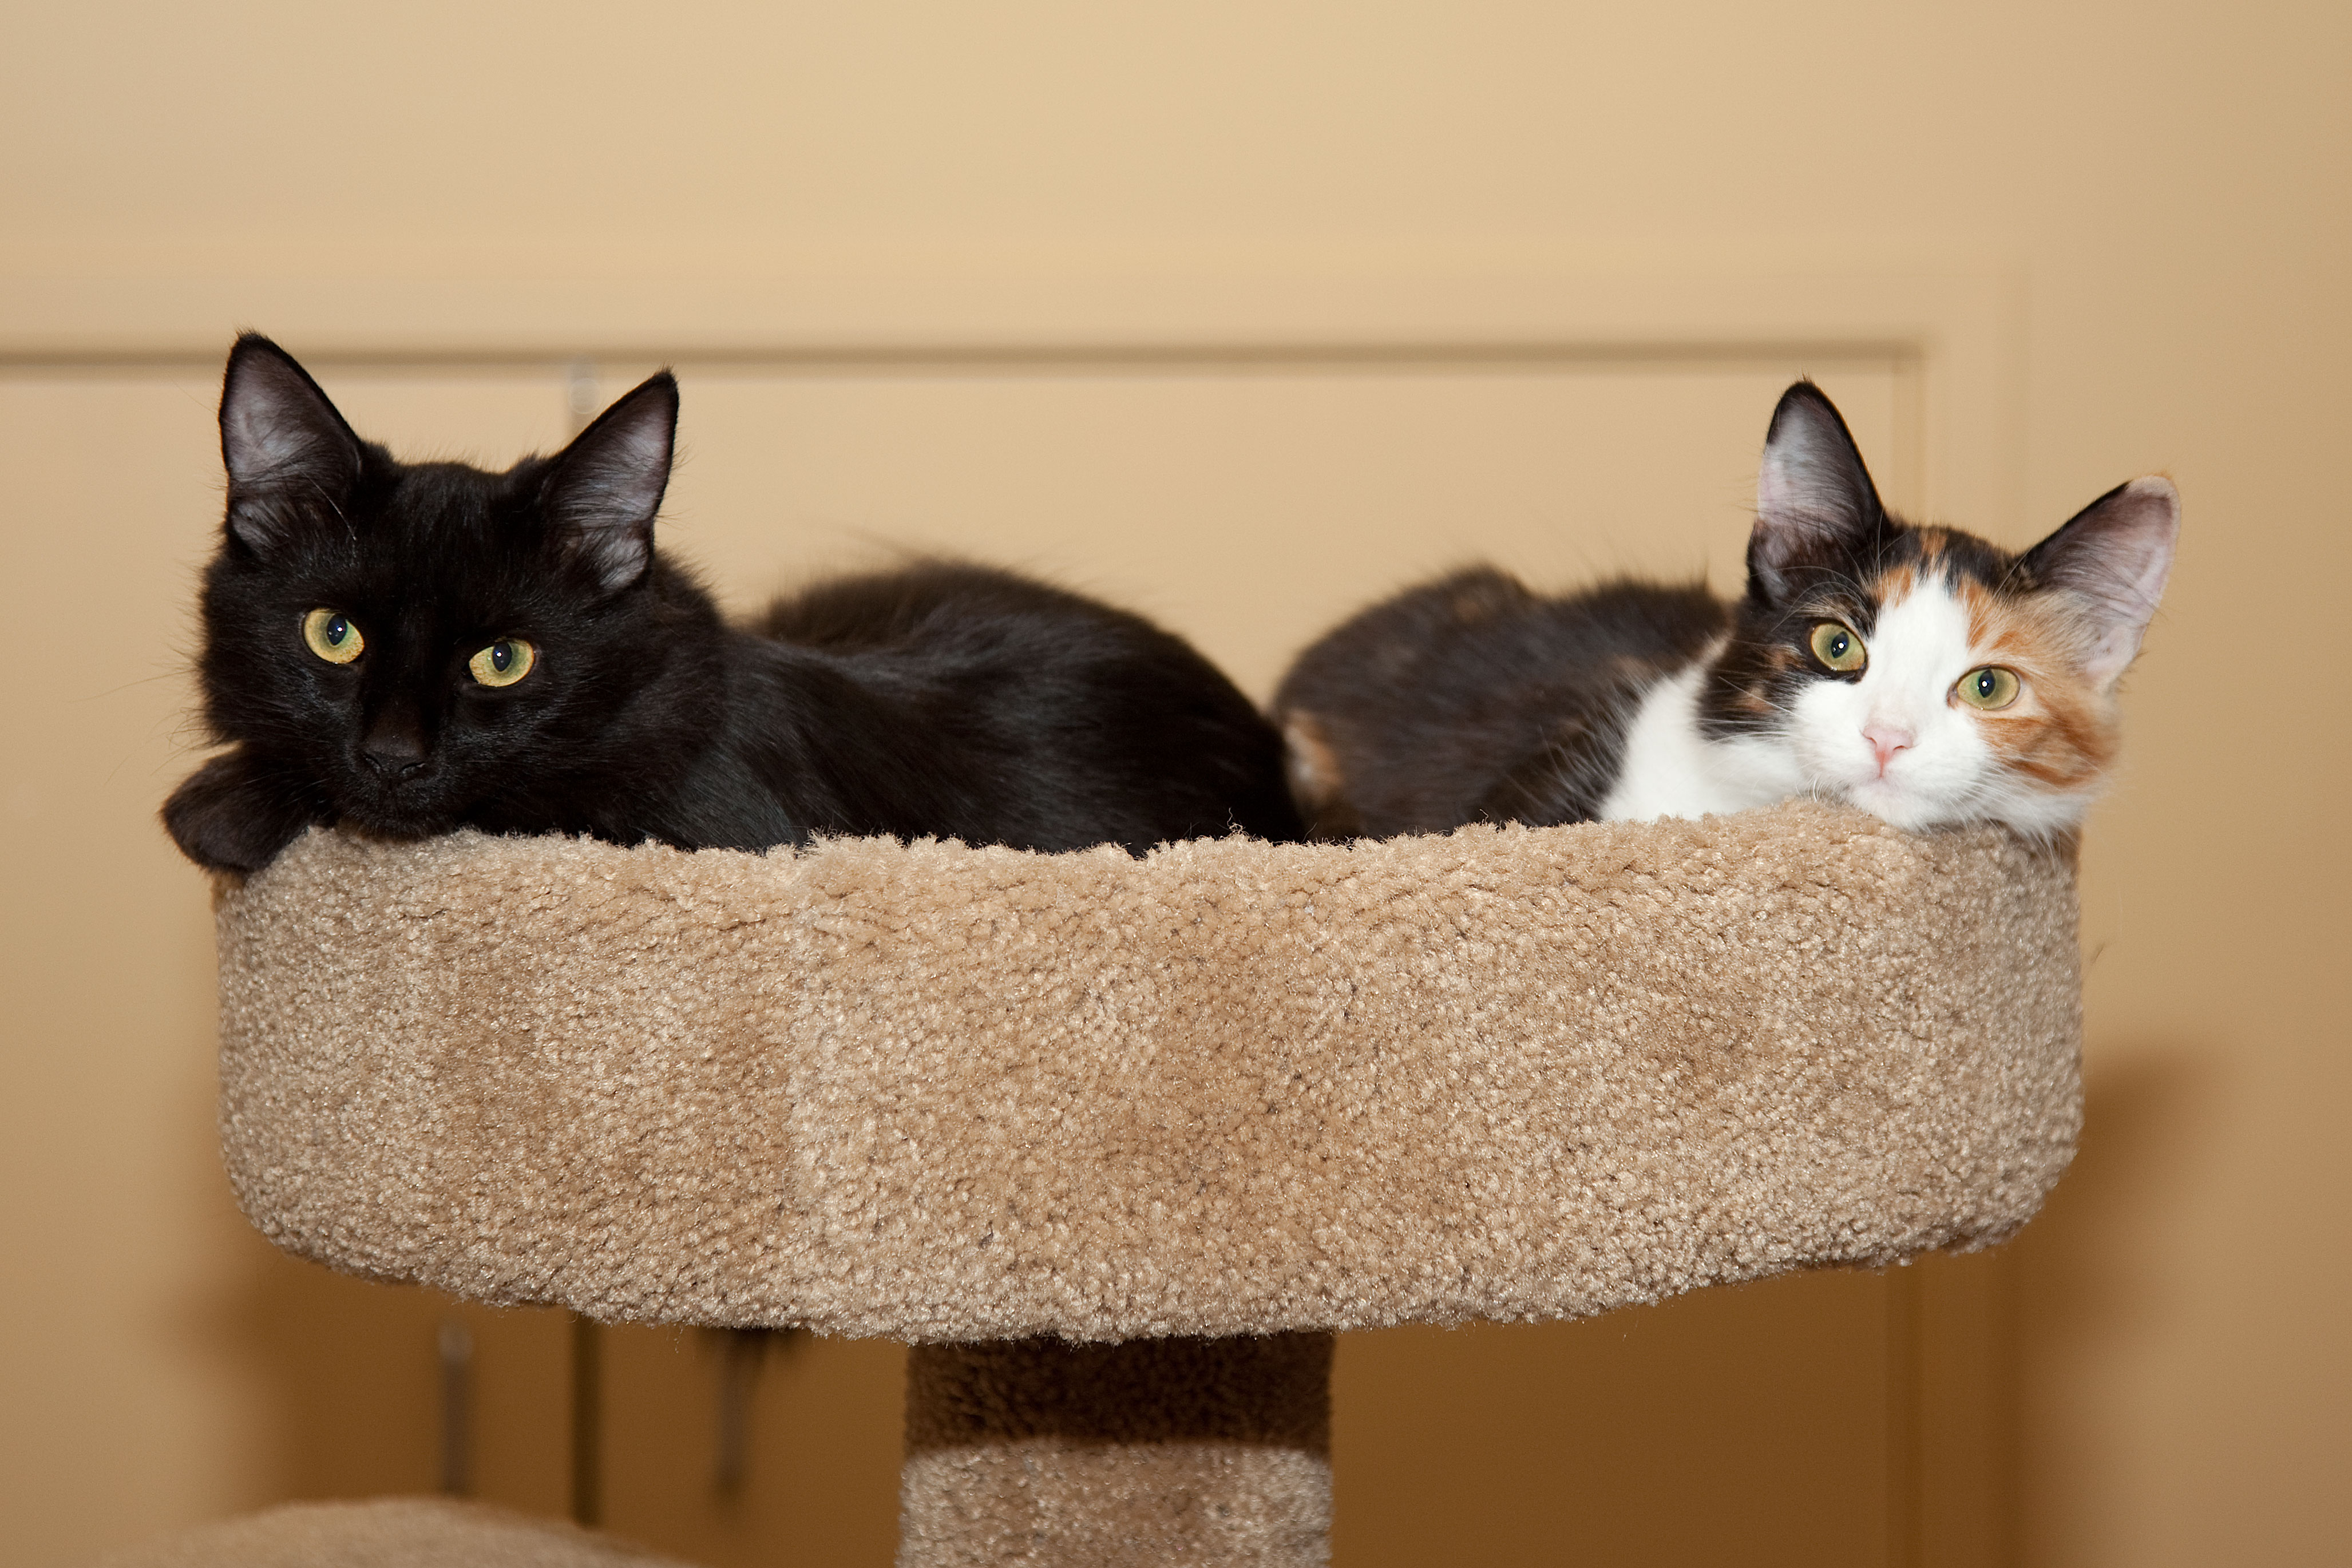
The kittens were staying put, so I had time to shoot a few more, but I wanted to get a better exposure. I knew from experience that the diffuser reduces light by about one stop, so I used the exposure compensation setting on the camera to overexpose the image by one stop. Actually, I screwed up and set it for one and a third stop of overexposure rather than one stop, but I didn’t notice that until later. The results, while not perfect, were appreciably better:

Hi!  We're cute!

If you look at the full-size version of the image, you can see that there’s actual definition in the black fur.  The white fur is a little bit blown out, but the net result is better than the first one.  I could fix both of these to some extent in Photoshop, but it’s better to get it right in the camera.  I haven’t adjusted the exposure of either of these, though I did crop them and sharpen the second one a bit.

So what is this exposure compensation thing?

Well, we already know that in most modes, including program, aperture priority, and shutter priority, the camera uses its meter to evaluate the image and then picks an exposure based on it.  In manual mode, you do this yourself, though you usually use the meter as a guide.  The camera does this by looking at the average brightness of the image and then picking an exposure that will best capture it.  When using automatic flash, the camera also tells the flash unit how bright it should be.  This often works very well, but in my case I knew something that the camera didn’t– there was a diffuser on the flash.

Exposure compensation tells the camera that it should overexpose or underexpose an image by a certain amount.  In my case, what I said to the camera was, “Hey, camera.  Make your best guess about the exposure, and then add one stop to it.”  I did this by changing the exposure compensation setting to +1 rather than 0.  Doing that allowed the camera to correct for the diffuser, and get a better-exposed image.

The exposure compensation on your camera looks something like this:

-2..1..0..1..+2
       ^

What you’re seeing is a representation of the camera’s meter, and an indicator underneath it showing what the compensation should be.  When the arrow is under the zero, the camera will pick the exposure it thinks is right.  However, when it looks like this:

-2..1..0..1..+2
          ^

the camera will add one stop to the exposure it thinks is right, resulting in a brighter image.  If the arrow was under the 1 on the left, the camera would subtract one stop and the result would be a darker image.

Exposure compensation is useful if you know that the camera is going to predictably underexpose or overexpose an image.  This might happen if you’re shooting with a very light background like snow, or a very dark background like a dark theater.  There are lots of other cases where it can happen as well.

Oh!  One other thing.  Sometimes people discover that their camera is suddenly making all of their pictures too dark or too bright. They wonder what’s wrong, and think their camera is broken.  What has usually happened is that they’ve accidentally set the exposure compensation, and the camera is doing exactly what it was told to.  Also, don’t forget to set it back to zero when you’re done, or your next shoot will have lots of over- or underexposed image.

I hope this helps explain the basics of exposure compensation.

And yes, yes.  I really did admit to using P mode on my dSLR.  As I said above, I didn’t want to think about the right settings for the flash.  I was in a hurry, because I wanted to catch the kittens before they moved.  Plus, I wasn’t really aiming for super high-quality images– in essence, I used four thousand dollars worth of equipment as to grab a quick snapshot.   P is only bad when it’s used for everything, or used without forethought or understanding of its weaknesses.

9 Comments

Filed under Exposure, Lesson

Histogram: What is it?

I confess… I’ve been neglecting Stop Shooting Auto! for a while.  I’ve been traveling constantly for the last couple of months, and that plus a full-time job has kept me quite busy.  In fact, I’m writing this while sitting at SFO while I wait for my delayed flight to take off.

AverageImageHistogram I promised I’d address the histogram next, so let’s do it.

Maybe you’ve seen something that looks like this, either in Photoshop or other image editing software, or on your camera when you reviewed an image.  Maybe you even took a guess at what it is and how it works, and if you did you probably guessed right.  That’s the histogram.

Histogram is a scary, technical-sounding word, but it’s actually a really simple concept.  The histogram is just a graph of how many dark and light pixels there are in your image.  At the far left you’ll see how many dark pixels there are, then moving to the right you’d see count of lighter and lighter pixels until the far right was pure white pixels.

AverageImageIn the histogram above, you can see that there are a very few solid black pixels, lots that are a little bit darker than average, a bunch that are a little lighter than average, and a chunk that are pure white. Let’s look at the image and see what it looks like.

There are a few pure black or very close to black pixels, mostly around the trash can and along the left wall– that’s the tiny hump on the far left.

The pure white pixels are mostly on the sign, in particular the words “San Francisco Marketplace” are pure white, and a tiny bit overexposed.  That’s the vertical bar right along the far right edge.

The dark of the sign, the dark carpet, and the dark part of the wall are the peak on the left. The peak on the right is the lighter part of the walls.

Most histograms that you will see don’t take color into account, only brightness.  That means that a very bright blue will look just like a very bright white.  Some cameras have the ability to do histograms with the colors separate, and of course most postprocessing software can do so as well.

DarkImageHistogramThis one is kind of fun. Without seeing the image, what can you tell me about it?  Obviously you can’t tell me what it’s a picture of, but can you make any guesses about what the image looks like?  Is it light or dark?  Does it have lots of different shades or only a few?  Are there any pure black or pure white areas in the image?

Do you think this image is well-exposed, underexposed, or overexposed?

OK, they’re calling my flight now.  Ciao!

2 Comments

Filed under Exposure, Lesson

Action Shots– A Quickie

IMG_8742I promised to write about histograms, but I’ve been pretty busy. However, here’s something quick I wanted to share. I went whale watching today with a couple of friends, and so of course I took the camera along. The thought process that I used here is pretty much my standard way of thinking about what I want to shoot.

Packing the camera bag was easy– the Canon 70-200 f/4L IS was the perfect lens choice, since it was long enough to bring the whales in close, and as a bonus image stabilization would help a little bit with the motion of the boat. Well, maybe, but it couldn’t hurt.

What about settings? I didn’t really care about depth-of-field other than wanting to have enough to get my subject in focus, so I set the camera to aperture priority mode and f/8. I realized that I was going to be shooting moving animals from a moving boat on choppy waters, and so shutter speed would be critical. I set the ISO to 100 and pointed the camera at the water, looked through the viewfinder, and pressed the button halfway to see what the camera would want to do. It picked 1/320 for a shutter speed. Under normal circumstances that would be fast enough, since it was faster than one over the focal length of the lens (1/200 in this case), but with all of that motion I wanted something faster. I took a wild guess and thought that 1/800 was a good minimum.

If I got 1/320 at ISO 100, then at ISO 200 I should be able to shoot 1/640. That still wouldn’t be enough, but at ISO 400 I should be able to shoot 1/1250. (Note: shutter speeds don’t always change in precise multiples of two. It’s confusing until you get used to it.) Since 1/1250 was well above my arbitrarily-chosen 1/800 threshold, ISO 400 should be perfect.

The sky was gray when we left the harbor, but I expected some of the fog to burn off over the course of the trip. I knew that I would have to doublecheck the settings if it started getting sunny– the fastest shutter speed my camera could do was 1/4000, which meant that I only had around two stops of room before my camera would be forced to overexpose the image. Sure enough, the sun came out a few hours later, but I was still able to shoot at around 1/2000. Otherwise, I would have either dropped down to ISO 200 or changed the aperture to f/11.

The thought process for this is one that you should use whenever you pick up a camera. What do I want this image to look like? What range of apertures and shutter speeds will get me the results I want? What camera settings should I use to get the right apertures and shutter speeds? As a novice you won’t always know all of the answers to those questions, but you can start guessing. “Do I want the background blurry or sharp? Do I want to capture or freeze motion?” Just answering those two questions before you pick up the camera will give you a huge leg up in getting the image you want.

Oh, yeah, a quick note about the gull. When I first looked at this picture on the camera’s LCD, I was rather shocked– the image looked blurry! It was taken at a shutter speed of 1/2500, so that hardly seemed possible. Either I’d seriously misjudged what shutter speeds would work, and I didn’t think I had, or something else was amiss. I zoomed in on the image and realized that the fuzziness I thought I was seeing was really the transition in feather colors at the rear edge of the wing. The image was actually so sharp that I could pick out individual feathers quite clearly.

4 Comments

Filed under Aperture, Exposure, ISO, shutter speed

What Is Bulb Mode?

I’ve touched on this briefly a couple of times, but it bears a little bit more discussion.

Bulb mode is kind of a special manual mode on your camera. On some cameras there’s a B mode on the exposure mode dial, but on others bulb is just a shutter speed– set the camera to M mode, change the shutter speed to 30 seconds (not 1/30, but half-a-minute 30 seconds) then go one step further. Once you’re there, set the aperture that you want to use.

Now what? Press the shutter button, and the shutter opens. Let go and it closes. You can keep the shutter open for as long as you want to, until your finger gets tired or your camera runs out of battery.

In order to make effective use of bulb mode, you really need another piece of hardware– a remote shutter release of some sort. I’m pretty sure that there are wired shutter releases available for all dSLRs and probably all film models too. In the simplest version, you plug the cable into the side of the camera, and when you press the button on the cable it activates the shutter. (This works in all camera modes, not just bulb.) In bulb mode, holding the button down holds the shutter open. Slightly fancier models have a shutter lock so that you can activate the shutter and then walk away for a while.

Many cameras also have wireless shutter releases available. These basically function the same way, except that they sometimes have two-press operation– press the button once to open the shutter. Press it a second time to close it. If you have a Canon Digital Rebel (original, XT, or XTi) the Canon RC-1 is a valuable addition to your kit. It lives on your camera strap and is completely unobtrusive when you don’t need it. If you want to release the shutter remotely, you just pop the RC-1 off of the strap and it’s ready to go. When you’re done, pop it back onto the strap and it’s out of your way. It’s not just for long exposures– it’s valuable whenever you want to be away from the camera, such as when you want to be in the photo. When I used a Rebel XT all the time, I was always reaching for the RC-1.

Some cameras may require you use the self-timer setting in order to use a remote shutter release.  Consult your manual for the details of your specific model.

Why would you want to use bulb mode? Mostly it’s for very-long exposures of over 30 seconds, but it has other uses too. I use bulb mode a lot when I’m shooting fireworks– I try to open the shutter just as a rocket is going up, and close it as the explosion fades. You can set the camera on a tripod at night and shoot the path of stars moving across the sky, or capture blurs of cars driving through the city.  Though I have no first-hand experience, bulb mode is also used for taking pictures of lightning strikes.  I’m sure there are plenty of creative uses that I can’t even imagine.

IMG_7804Another cool technique that uses bulb mode is light painting. Light painting involves taking the camera into a darkened room, opening the shutter, and then using light sources (LEDs, flashlights, whatever) to paint light onto an object or just onto the sensor itself. While it didn’t use bulb mode, the image at left was taken by opening the shutter in a dark room then moving an LED glow ball in front of the camera.  As you might have guessed by now, I like playing around in front of a camera with bright objects in a dark room– you just never know what kind of cool image you might wind up with.

Bulb mode is a specialist tool, but it’s a really useful one to know about.  You probably won’t need it very often, but sometimes it’s the only real choice for getting the shot you want.

10 Comments

Filed under Controls, Exposure, shutter speed

April Homework: On The Move (again, with a prize)

I’ve extended the April homework assignment through the end of May.  Have fun!

The March homework assignment worked out so well that I’m doing it again.

We all know that photos are static representations of the world– a moment frozen in time by the camera’s shutter. However, photos can also be dynamic, and show both split-second and slow changes.

JohnInMotionThis month’s homework assignment is both very simple and much harder than last month’s– capture something in motion. It can be a golf stroke, cars whizzing by, the blur of a bird’s wings, anything you choose, but I want to see some nice motion blur.

Like last month, the idea here is to plan the image before you capture it, not just shoot a bunch and hope you get lucky. You can use aperture priority, shutter priority, manual, or bulb modes at your discretion. Bulb mode isn’t something we’ve talked much about, but it’s really very simple– rather than using a fixed shutter speed, the shutter stays open for as long as you hold the button down. Bulb mode is typically used with a remote shutter release of some sort, so that you don’t shake the camera by pressing the shutter button. It’s most commonly used when you want exposures longer than 30 seconds. You probably won’t need it for this, but you can use it if you want to.

One thing to be aware of is that longer exposures are much easier than shorter ones, since it can be easier to get the timing right.

Upload your photo to a photo sharing site (I recommend Flickr but any one will do). Leave a comment on this message with the settings that you used, a link to your photo, and anything else you want to say about the image.

Colors In MotionAt the end of April 2008, I’ll pick one commenter at random and send them an 8×12 signed print from my flower porn collection. If at least 20 people submit entries, I’ll give away a second print to the submitter of the best image. You can enter more than once, but don’t get carried away.

Have a field day! This one should be fun.

Small print: void where prohibited by law. Anyone who clearly violates the spirit of the rules will be disqualified. Don’t put that in your mouth… you don’t know where it’s been. Please make sure your images are worksafe. You can post more than one photo, but you’ll only get one chance at the drawing. It must be a photo that you took specifically for this assignment, not something pulled out of the archives. Play nice. Judging is at my discretion, and is final. SSA might want to show your image in a future entry, but we don’t want any other rights to it– if we want to use it for anything else, we’ll play nice and ask for your permission first.

12 Comments

Filed under Exposure

What is bracketing?

I wrote a little bit about bracketing earlier, but it’s an important concept and it deserves its own entry.

You’ll often hear photographers talk about bracketing an image. Bracketing sounds pretty technical, but it’s really just a fancy term for taking multiple shots of the same image at slightly different exposures. With some scenes, it’s really hard to know whether you’ve gotten the exposure right, and it’s worth taking a few extra shots to make sure one of them will be good.

Let’s say that you’re shooting a scene and the camera’s meter thinks that the right exposure is f/8 and 1/200 sec. Maybe it is, but maybe that will result in a little bit of underexposure or overexposure. If you wanted to bracket one stop on either side, you could take one shot at f/8 and 1/100 sec, one at f/8 and 1/200 sec, and one at f/8 and 1/400 sec. Alternately, you could take one at f/8 and 1/100 sec, one at f/5.6 and 1/100 sec, and one at f/11 and 1/100 sec. Either way, you’d wind up with three images and if the camera was anywhere close to being correct you probably will wind up with one perfectly-exposed image.

In the days of film, bracketing was often a necessary but expensive operation. Digital cameras have made it cheap to take multiple exposures, since there are no film developing costs. Flash cards are both cheap and reusable, and you can fit lots more images onto them than you could on a roll of film.

Bracketing sounds cool, but I bet it also sounds like a lot of work. Want me to make it easier for you? OK, piece of cake.

All modern dSLRs have a function called automatic exposure bracketing, or AEB. When you enable AEB, you tell the camera how large an increment you want to use, and then whenever you press the shutter the camera takes three images– one at what it thinks is the correct exposure, one underexposed by the amount you specified, and one overexposed by the same amount. Click click click. You can usually specify the size of the compensation in 1/3 or 1/4 stop increments up to two full stops, sometimes three

Look at the specifications for your camera, and you’ll see something that looks like this:

AEB: +/- 2.0 EV, 0.5 or 0.3 EV increments

That means that you can bracket plus or minus two full stops, and you can choose either 1/3 or 1/2 stop increments. EV means Exposure Value, and it basically means the combination of aperture and shutter speed for an exposure.

Voila! All you have to do is turn it on, and your camera will do the work for you. Consult your camera’s manual to figure out how to enable exposure bracketing on your camera.

In situations where the lighting is tricky, I highly recommend using aperture-priority or shutter-priority mode and then bracketing your shots. This will give you a much better chance at getting a perfectly-exposed image.

Now, go try it out! Put your camera into either aperture priority or shutter priority mode, and enable automatic exposure bracketing. Find something well-lit, and take a picture. You’ll hear three clicks of the shutter, and wind up with three images. (It’s like a buy-one get-two-free sale.)

For extra credit, put the camera in manual mode, set the aperture and shutter speed to what the camera thinks is the right exposure, and then manually take three shots, changing the shutter speed to bracket by one full stop. Look through the viewfinder and check the meter before each shot. For one it should be right in the center, for one it should be one stop to the left, and for the third it should be one stop to the right of center.

2 Comments

Filed under Controls, Equipment, Exposure

A really cool utility!

I found this site while browsing a Flickr discussion today.  It’s a camera simulator that lets you look at a high-light, medium-light, and low-light scene and then tweak the aperture, shutter speed, and ISO to see how the photo will change.  You can put the camera into aperture priority, shutter priority, and manual modes and tweak all of the controls.  (There are also a couple of other modes available– program and automatic– but they aren’t interesting to us anymore, are they?)  There’s also a setting for exposure compensation, which we haven’t talked about before but is used for telling the camera to intentionally under- or overexpose a shot by a certain amount.

Check it out.

And when you’re done, grab your camera and try doing the same thing.

1 Comment

Filed under Exposure

Two interesting photos

I’m a big fan of the Day in Pictures on SFGate — the photos are generally quite interesting, they’re well-captioned, and the editor likes to play amusing games with proximity.

Today’s set had two photos that are excellent illustrations of the things you can do if you understand exposure. This one shows an elderly man praying in the middle of the road, with cars whizzing by on either side of him. The blur of the cars is worrisome– you’re sure he’s going to get hit at any moment– but it shows his conviction.

The second one shows a landscape with a closeup of poppies in the foreground. The poppies are crisp and sharp, and the background is reasonably sharp as well.

Take a moment to think about how you might shoot those two photos.

Got it? OK, here’s my take.

The first one requires a slow shutter speed in order to capture the motion of the cars. If we look closely, we can see that everything is sharp as far as the eye can see. This suggests that the photographer used a very narrow aperture and a slow shutter speed, and probably a low ISO as well. We don’t know how fast the cars are moving, but let’s guess, oh, 30MPH. We can ask Google and find out that’s 44 feet per second. I’d guess that the shutter speed was somewhere between 1/2 second and 1 second. I’d guess that the photographer also used a neutral density filter (something I haven’t talked about, but it’s basically a piece of grey glass that reduces the light coming into the camera) to get a slower shutter speed.

The poppies were clearly shot at a fairly small aperture, since the background was mostly in focus. The shutter speed is indeterminate, but was probably “whatever it takes”.

Whenever you see an interesting and unusual picture, take a minute to see if you can figure out what the photographer did to get it. This is excellent practice for figuring out your own shots when you’re trying to get a specific effect.

1 Comment

Filed under Discussion, Exposure

How to take a picture of the moon

If you’re in a hurry you can ignore the discussion and skip straight to the summary


moonSince a couple of people have requested this, here’s the Stop Shooting Auto! lesson in shooting the moon.

Back in the olden days, when cameras were carved out of stone and didn’t have whizbang light meters and dozens of confusing exposure dials, photographers had to choose their settings manually. In fact, my first 35mm camera, a Kodak Pony IV, had printed inserts that went into a slot in the back of the camera to help you pick your settings. For bright sunlight you used this, for cloudy bright you used that, etc. And horror of horrors, there was no Photoshop– if you screwed up the exposure, you had to try to fix it in a (gasp) darkroom. And that was if you were lucky– most people just lived with whatever bad photos they took.

GreenCheeseBack in these dark, dark days, photographers often relied on rules of thumb to help them choose their exposures. The most common of these was called the Sunny f/16 Rule. The rule went like this: for objects that are brightly lit by the sun, set your aperture to f/16. Set your shutter speed to 1/ISO of the film. (Film? Do you remember that?) So if you were shooting with ISO 100 film, you’d set the camera to f/16 and 1/100 sec, or as close to that as you could get. At ISO 200, it was f/16 and 1/200 sec.

I know what you’re thinking. That’s great, Patti. Thanks for your little stroll down memory lane, but someone has been spiking your Geritol. I want to photograph the moon, and I want to do it at night when it’s dark out. Why would I care about sunny days?

Here’s a little secret. The moon is nothing more than a bright object lit by the sun. Sure, it’s in a dark sky and everything around you is dark, but the moon is surprisingly bright. However, it’s also pretty far away, and that makes it look pretty small in the sky and even smaller through your camera’s lens. Unless you have a very long telephoto lens, your camera’s meter just won’t know what to do with the shot. If you’ve tried to take a picture of the moon in automatic mode, you probably got a small white dot on a dark but washed-out background. We can fix that, but it will mean putting your camera in manual mode. I hope that’s not as scary to you as it would have been before you started reading this blog.

Let’s go back to that telephoto lens thing for a moment. The first thing you want is the longest telephoto lens you can get, so that the moon looks like something other than a white dot. 200mm is about the shortest, 300mm is better, and 500+ is even better than that. If you don’t have a long lens, a teleconverter is a useful accessory to have. In a nutshell, a teleconverter is kind of like a magnifying glass added to your lens. With a 1.4x teleconverter, a 200mm lens acts like a 280mm lens, and with a 2x teleconverter, a 200mm lens acts like a 400mm lens. There are some serious downsides to using teleconverters, but they can also be useful tools.

[Update: I’ve recently added an article titled What lens should I use to take a picture of the moon? It has examples of moon shots at focal lengths from 200mm to 2240mm.]

Something To Howl AtOK, so you have your longest lens out. You might want to use a tripod too, lean the camera against a wall or something to stabilize it. What settings should you use?

First off, use manual focus. Because the moon is pretty small in your viewfinder, many cameras have trouble focusing on it. If yours works in autofocus that’s great, but if not just switch to manual focus and do it the old-fashioned way.

In my experience, the Sunny 16 Rule is close but not quite right for the moon. The best settings I’ve found seem to be around ISO 100, f/11, and 1/100 sec. However, sometimes something a little slower or faster does a better job. Because of this, I recommend doing something called bracketing. Bracketing is just a fancy term for taking a bunch of shots at slightly different exposures so that you can pick out the best one.

Set your camera for manual mode, ISO 100, f/11, and 1/100 of a second. Take a picture. Now without changing any other settings, set the shutter speed to 1/200 and take another picture. Do the same thing at 1/400. When you’ve done those three, go the other way. Set the shutter speed to 1/50 and take a picture, then 1/25. If you aren’t using a tripod, don’t forget to brace the camera against something solid like a wall or a pole, so you don’t get camera shake. And voila! One of those is probably a pretty good shot of the moon.

To summarize:

  • Manual mode, at f/11 and ISO 100
  • Focus manually
  • Use a tripod or stabilize your camera against a sturdy object like a wall
  • Start at 1/100 sec and take a shot
  • Bracket a couple of shutter speeds faster and slower (e.g., 1/60, 1/30, 1/200, 1/400, or whatever speeds are closest to those on your camera)
  • Look at the images on your computer and pick out the best one

The next time you have a clear, dry night and the moon is in the sky, try it yourself.

And here are a few products that may be useful in shooting the moon:

Tamron 1.4x Pro Teleconverter for Canon cameras

Tamron 1.4x Pro Teleconverter for Nikon cameras

The Tamron pro series of teleconverters are optically quite excellent.  Their physical geometry makes them work with most telephoto lenses (at least on Canon… I’m less familiar with Nikons), and they give you a fair bit of extra focal length to bring the shot in closer.

Canon RC-1 Wireless Remote Control

This little gizmo is amazing.  It lives on the strap of your camera, completely out of your way, but just waiting until you need it.  When you do, pop it off and voila– you have a wireless infrared remote.  It works with most Canon dSLRs, it’s inexpensive, and it’s incredibly useful.

108 Comments

Filed under Exposure, Lesson

Exercise: exposure modes

Are you ready for the first exercise? Great, let’s go. If you haven’t ready the last lesson on how exposure modes work, you’ll want to do that first. In this exercise, we’ll try out the various exposure modes in order to learn how the controls work.

OK, grab your camera. It doesn’t matter what lens you use, but try to find a place with a lot of light and something at least marginally interesting to point the camera at.

The first thing we’re going to do is put the camera in aperture priority mode. If this is the first time you’ve taken your camera out of its everything-automatic rut, this may be scary for you. Don’t worry, I’ll be right here to hold your hand. Now, take a deep breath and turn the dial to Av, A, or whatever your camera calls it.

See? That wasn’t so bad.

Now, pick out something nearby that you can focus on. Maybe it’s a picture or a piece of furniture or a tree, but pick something that isn’t going to move around a lot. Now, look through the viewfinder of your camera and focus on the thing that you picked out. Press the shutter button halfway, and you should see a display in your viewfinder that will tell you what the aperture and shutter speed are set to.

Turn whatever dial it takes on your camera to open the aperture as wide as it will go– remember, that’s the lowest number. It may be as low as 1.4 or 1.8, but more likely your lowest setting will be somewhere between 2.8 and 5.6. It doesn’t matter for now. Keep pointing the camera at whatever object you picked out.

If you did that quickly enough, which you probably didn’t, you’ll still have a display in your viewfinder. If not, push the shutter button down halfway to get it back. Make a mental note of what shutter speed the camera has picked out. Now, turn the aperture dial a few clicks. Do you see the shutter speed change? (If the display goes away, just keep pressing the shutter button halfway.) Keep doing this until the aperture is as small as it will go– most likely, that will be around 22, but your lens may be different.

Did you notice how the shutter speed changed automatically every time you changed the aperture? That was your camera’s meter picking out the right shutter speed to go with the aperture you chose. It’s possible that your camera had trouble with the highest and lowest settings, and couldn’t find a shutter speed fast enough or slow enough to work. If so, it probably kept the needle all the way on the left or right of the meter display, and maybe flashed it or beeped or complained in some other way. If so, remember that for the future. It’s your camera’s way of saying that something’s not right.

Now, let’s do the same thing but in shutter priority mode. Set your camera to Tv or S or whatever. Look through the viewfinder, and press the shutter button halfway. Turn the magic dial to change the shutter speed, and watch the selected aperture change. If you pick a really fast shutter speed like 1/1000, there’s a good chance you’ll get to see how your camera complains about bad exposures.

OK, there’s one more step, but before we take it you probably need a quick break from all this scariness. Get up, walk around the room, do a jumping jack, grab a beer, or do whatever it takes to get past all the scariness I’ve thrown at you.

Are you back? Excellent. Now, we’re going to do one more scary thing. Set the camera to manual mode. Ready? Deep breath. OK, go.

Still with me? Great! Now, set your aperture to f/8, using whatever control your camera uses to change the aperture in manual mode. Now look through the viewfinder and press the shutter halfway. See the indicator on the meter? It’s probably way off to one side. Keep looking through the viewfinder while you turn whatever dial changes the shutter speed. Keep doing this until the indicator is right smack dab in the center of the scale. When you get it there, take the picture.

Guess what? You just took a photo in manual mode. If you view it on the camera’s LCD, you’ll probably see that it looks pretty good. Pretty cool, huh?

If your room isn’t very bright, there’s a chance that you couldn’t make that work. If so, set the aperture as wide as it will go and try again, or go somewhere with more light.

Next lesson: Shutter speed exercise

14 Comments

Filed under Aperture, Controls, Exercise, Exposure, shutter speed